SendEmail
SendEmail (not to be confused with Sendmail) is a cross-platform lightweight, command line SMTP email client.
Windows Installation & Use With Windows Task Scheduler
1. Download and extract sendEmail to the “Program Files” directory (or Program Files (x86) if you are working on a 64bit Windows system).
NOTE: There are two different versions of sendEmail with one supporting TLS while the other does not.
2. Open a text editor and paste the following code substituting the details for your own:
@echo off

REM Batch file used in conjunction with Task Scheduler to send an email when the computer starts up and enters the Windows environment.

start "sendEmail" "C:\Program Files (x86)\sendEmail\sendEmail.exe" -o tls=no -f from_user@example.com -t to_user@example.com -cc another_user@example.com -u "Subject Name" -s smtp.server.address:25 -xu username@example.com -xp userpassword -m "Message body here"
NOTE: The above example uses the file path for a 64bit system, please alter your file path to match that of your system.
Save the batch file to a convenient location, in this example it resides in the root of the C drive.
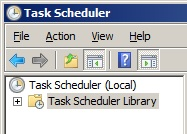
3. From the start menu ppen Task Scheduler, then when open click on ‘Task Scheduler Library’.
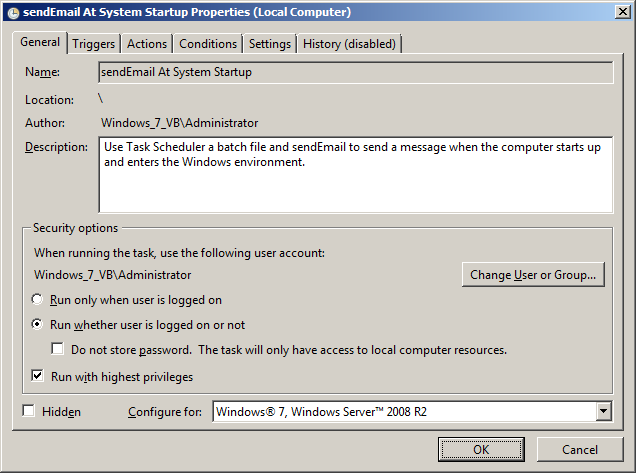
4. From the ‘Action’ menu select ‘Create Task’, alternatively click on 'Create Task' available under 'Actions' in the right hand column. A new window will open on which the ‘General’ tab should be selected.
5. Enter the details required in the ‘General’ tab, see the example below:
5a. Click the ‘OK’ button.
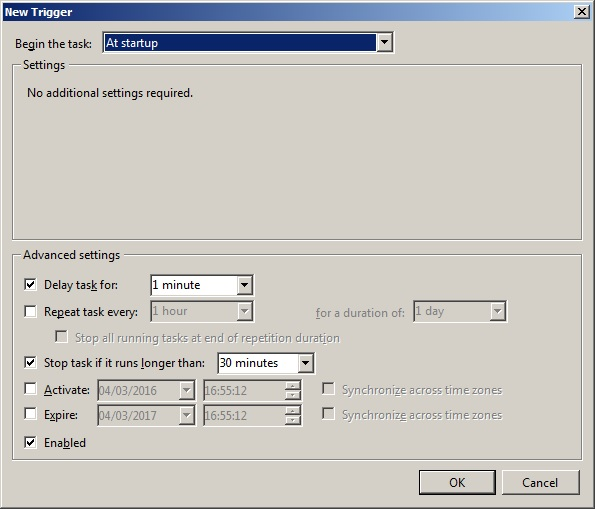
6. Select the ‘Triggers’ tab, click the ‘New...’ button to open the ‘New Trigger’ window.
7a. From the drop down menu next to ‘Begin the task:’ select the ‘At startup’ option.
7b. Under ‘Advanced settings’ check the box for ‘Delay task for:’ and select a time or edit it to suit your needs. Check the box for ‘Stop task if it runs longer than:’ and again select a time or edit it to suit your needs.
7c. To finish click the ‘OK’ button.
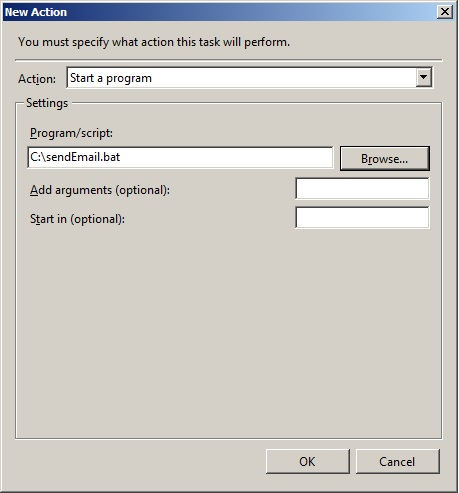
8. Select the ‘Actions’ tab, click the ‘New...’ button to open the ‘New Action’ window.
9a: From the drop down menu next to ‘Action’ ensure the ‘Start a program’ option is selected.
9b. Click the ‘Browse...’ button and navigate to and then select the batch file you created in step 1.
9c. To finish click the ‘OK’ button.
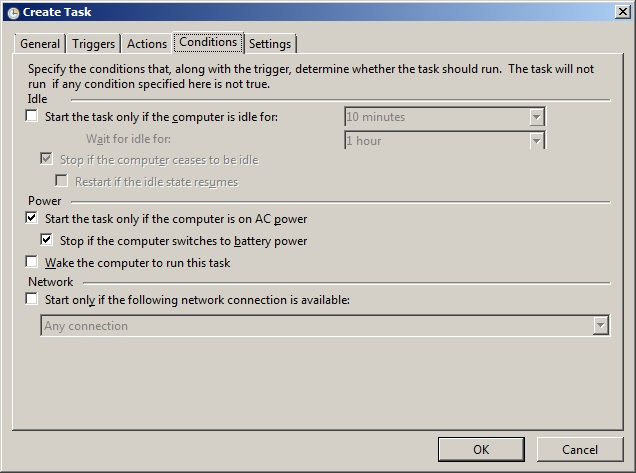
10. Select the ‘Conditions’ tab, and check that only the check boxes are marked for ‘Start the task only if the computer is on AC power’ and ‘Stop if the computer switches to battery power’.
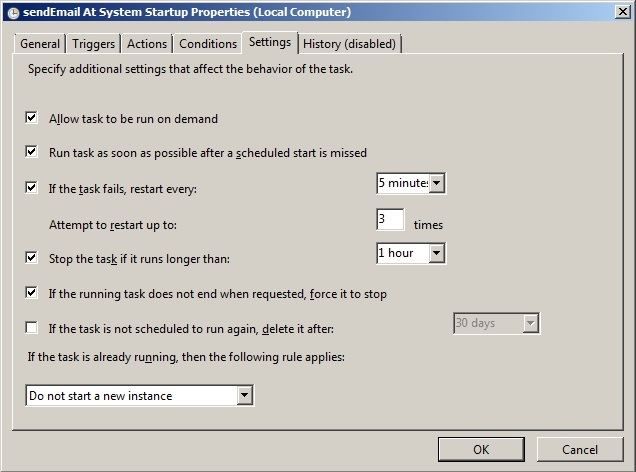
11a. Select the ‘Settings’ tab.
11a. Alter the settings to match those show in the picture below:
11c. Click the ‘OK’ button to complete and save the scheduled task. 11d. If prompted enter a password for the user selected earlier.
You should now end with a new job entered in Task Scheduler:
NOTE: By default the ‘History’ option is disabled for all scheduled tasks. To enable it in the main window’s ‘Action’ column click on ‘Enable All Tasks History’. This is useful for confirming that your task has successfully run.
