GIMP
From Indie IT Wiki
Revision as of 18:09, 4 March 2016 by imported>Indieit (→HOWTO:)
HOWTO:
Batch Image Manipulation (BIMP)
To undertake the manipulation of batches of images a plugin requires installing:
Downloads:
- Windows EXE file
- Linux source code
- Apple OS X - The plugin baked in to the default native build of GIMP for Mac OS X available here, however, it's not guaranteed to be the very latest version.
Under Linux the plugin requires installation of the following dependencies:
sudo apt-get install libgimp2.0-dev libpcre3-dev
To install under Linux navigate in the terminal to the folder you have extracted it to, then run one of the following depending on your system:
make && make install
make && sudo make install-admin
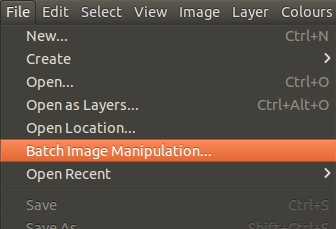
Once installed the plugin can be accessed via the File menu:
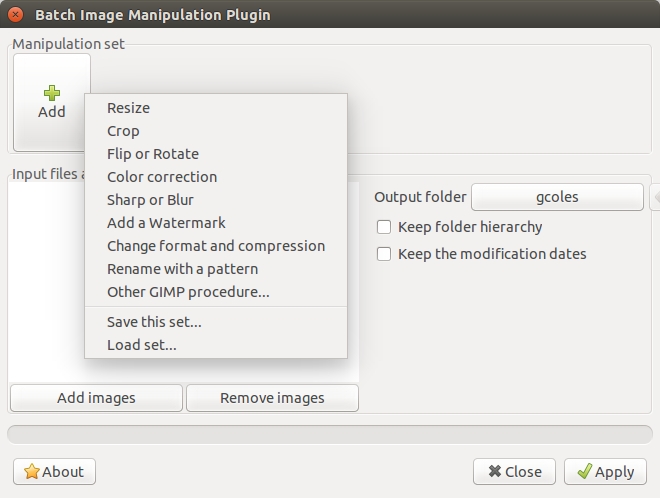
The plugin can undertake a variety of functions:
Thanks go to Alessandro Francesconi for producing the plugin.
Borders On Selections
- Choose circle selection tool
- Begin drawing
- Hold down SHIFT to keep it round
- Let go when large enough
- Move into position
- Choose Foreground Colour
- Edit > Stroke Selection
- Hit OK
Thanks to GIMP Tutorials.
Replace All Pixels Of One Colour
- Menu --> Select --> By Colour
- Reduce the 'Threshold' count to zero
- Click on a pixel of the colour to be replaced
- Use the bucket tool to fill the select pixels with your chosen colour, remembering to select the option "Fill whole selection" in the Bucket fill tool
Thanks to Andrés Mejía.

