Difference between revisions of "Cryptocurrency"
Plittlefield (talk | contribs) |
Plittlefield (talk | contribs) |
||
| (130 intermediate revisions by the same user not shown) | |||
| Line 38: | Line 38: | ||
The easiest way to acquire cryptocurrency is to purchase on an online exchange like [https://www.coinbase.com Coinbase], which is the world's most trusted and most secure platform to buy, sell and manage crypto. | The easiest way to acquire cryptocurrency is to purchase on an online exchange like [https://www.coinbase.com Coinbase], which is the world's most trusted and most secure platform to buy, sell and manage crypto. | ||
| + | |||
| + | === Top Exchanges === | ||
| + | |||
| + | * [https://www.coinbase.com Coinbase] | ||
| + | * [https://www.kraken.com Kraken] | ||
| + | * [https://www.binance.com Binance] | ||
| + | * [https://www.kucoin.com KuCoin] | ||
| + | * [https://www.probit.com ProBit] | ||
| + | * [https://www.coinjar.com/uk/ CoinJar] | ||
| + | |||
| + | === United Kingdom FCA Approved Crypto Exchanges === | ||
| + | |||
| + | https://www.finder.com/uk/uk-registered-cryptocurrency-exchanges | ||
| + | |||
| + | https://www.ccn.com/crypto-register-fca-uk-list-approved-firms/ | ||
| + | |||
| + | https://register.fca.org.uk/s/search?predefined=CA | ||
| + | |||
| + | === Buying Crypto Anonymously No KYC === | ||
| + | |||
| + | Decentralised Bitcoin Exchanges. | ||
| + | |||
| + | [https://koinly.io/blog/top-no-kyc-crypto-exchanges/ Top No KYC Exchanges] | ||
| + | |||
| + | [https://kycnot.me KYC Not Me] | ||
| + | |||
| + | [https://bisq.network/ Bisq] | ||
| + | |||
| + | [https://www.coincola.com/buy-bitcoin/gift-cards CoinCola - Gift Cards] | ||
=== Risks === | === Risks === | ||
| Line 66: | Line 95: | ||
== Top Assets == | == Top Assets == | ||
| − | # Bitcoin | + | # Bitcoin (BTC) |
| − | # Ethereum | + | # Ethereum (ETC) |
| − | # Tether | + | # Tether (USDT) |
| − | # BNB | + | # Binance (BNB) |
| − | # | + | # US Dollar (USDC) |
| − | # | + | # Ripple (XRP) |
| − | # Solana | + | # Solana (SOL) |
| − | # Cardano | + | # Cardano (ADA) |
| − | # Dogecoin | + | # Dogecoin (DOGE) |
| − | # | + | # Tron (TRX) |
| − | # | + | # Polkadot (DOT) |
| − | # | + | # Polygon (MATIC) |
https://coinmarketcap.com/ | https://coinmarketcap.com/ | ||
https://www.coinbase.com/browse | https://www.coinbase.com/browse | ||
| + | |||
| + | === Bitcoin === | ||
| + | |||
| + | Bitcoin was the first ever Cryptocurrency, created by Satoshi Nakamoto in Japan. | ||
| + | |||
| + | What Is a Satoshi? | ||
| + | |||
| + | The satoshi is the smallest denomination of the cryptocurrency bitcoin. It is named after Satoshi Nakamoto, the Bitcoin creator. The satoshi to bitcoin ratio is 100 million satoshis to one bitcoin. | ||
== Exchange Rate == | == Exchange Rate == | ||
| Line 96: | Line 133: | ||
[https://www.binance.com Binance] | [https://www.binance.com Binance] | ||
| + | |||
| + | ==== Coinbase to Binance with Zero Fees ==== | ||
| + | |||
| + | Get USDT to Binance Spot Account for Auto Invest. | ||
| + | |||
| + | # Coinbase - Add Cash | ||
| + | # Coinbase - Buy USDC | ||
| + | # Binance - Receive USDC via Solana network - copy address | ||
| + | # Coinbase - Send USDC via Solana network - paste address | ||
| + | # Binance - Convert USDC to USDT | ||
==== Convert ==== | ==== Convert ==== | ||
| Line 130: | Line 177: | ||
curl -s <nowiki>https://api.coinbase.com/v2/prices/ETH-USD/spot</nowiki> | jq -r .data.amount | curl -s <nowiki>https://api.coinbase.com/v2/prices/ETH-USD/spot</nowiki> | jq -r .data.amount | ||
| − | === | + | === KuCoin === |
| − | [ | + | ==== Moving Assets From ProBit Global To KuCoin ==== |
| + | |||
| + | * [ProBit] trade sell your BTG for USDT | ||
| + | * [KuCoin] deposit USDT and select the '''Arbitrum One''' network to get an address | ||
| + | * [ProBit] withdraw USDT and select Blockchain Type '''Arbitrum One''' then paste address | ||
| + | * [ProBit] check the fee (should be about 0.14 USDT which right now is the cheapest) and click Withdraw button | ||
== AI == | == AI == | ||
| + | |||
| + | [https://www.kucoin.com/support/19843150706329 Spot Grid AI Plus - KuCoin Trading Bots] | ||
[https://botcrypto.io BotCrypto - Crypto Trading Bots] | [https://botcrypto.io BotCrypto - Crypto Trading Bots] | ||
| Line 140: | Line 194: | ||
== Trading == | == Trading == | ||
| − | === | + | === Bots === |
| − | + | '''What Is a Crypto Trading Bot?''' | |
| − | + | A crypto trading bot is a computer program that uses artificial intelligence and advanced algorithms to automate the buying and selling of cryptocurrencies. Acting as a virtual assistant, these bots analyze vast amounts of market data, identify patterns, and execute trades in the crypto market accordingly. They can simplify the trading process and provide a competitive edge by leveraging real-time and historical market data. | |
| − | + | Much like the crypto market that never sleeps, crypto trading bots can operate 24/7, taking advantage of market opportunities even when you cannot actively monitor the market. By automating trading actions, these bots aim to optimize trading strategies, improve efficiency, and potentially increase profits. | |
| − | + | '''How Do Trading Bots Work?''' | |
| − | + | There are two kinds of crypto bots: one that needs to connect to cryptocurrency exchanges like KuCoin, where they can access real-time and historical market data, and the other that is offered directly by crypto exchanges on their platforms like KuCoin’s trading bots, which require no technical expertise to configure. By setting predefined parameters and trading strategies, you can configure your bots to execute trades automatically when specific market conditions are met. | |
| − | + | https://www.kucoin.com/learn/trading/what-are-crypto-trading-bots | |
| − | + | '''What are the types of Crypto Trading Bot?''' | |
| − | + | ''Spot Grid'' - Spot grid trading bot is particularly effective in ranging crypto market conditions. It thrives when the prices of cryptocurrencies move within a certain range, as the grid structure enables users to profit from the recurring price oscillations that are characteristic of such market conditions. By intelligently placing buy and sell orders within this range, the KuCoin Spot Grid trading bot excels in harnessing price movements and market trends, making it a valuable tool for traders seeking to navigate and capitalize on a range-bound cryptocurrency market. | |
| − | + | ''Martingale'' - KuCoin’s Martingale trading bot implements a high-risk, high-reward strategy. It increases the trade size after a losing trade, aiming to recover losses with larger subsequent trades. This strategy requires careful risk management to prevent significant loss. The KuCoin Martingale trading bot automates the Martingale strategy, allowing you to capitalize on the volatility of crypto markets. The bot buys more when prices fall and sells when prices rise, effectively betting on the reversal of a downtrend. It is best suited for traders who are willing to take calculated risks and believe in their chosen crypto asset's potential to recover from lows. The bot operates 24/7, adjusting its trading volumes based on price movements, and is free to use, with the only charges being transaction costs incurred during the buying and selling of cryptos. | |
| − | + | https://www.kucoin.com/trading-bot/spot/grid | |
| − | |||
| − | |||
| − | + | === Pionex === | |
| − | [https:// | + | [https://www.pionex.com/blog/how-do-i-transfer-my-assets-to-pionex/ How do I transfer assets from Coinbase to Pionex?] |
| − | == | + | === Links === |
| − | + | [https://academy.binance.com/en/articles/a-complete-guide-to-cryptocurrency-trading-for-beginners A Complete Guide to Cryptocurrency Trading for Beginners] | |
| − | + | [https://investocks.org Investocks] - Investocks allows you to actively invest in most popular cryptocurrencies such as Bitcoin, Ethereum, Ripple, Litecoin and more, profit from market rallies and declines, or hedge your existing cryptocurrency holdings. | |
| − | == | + | == Swapping == |
| − | + | [https://duckduckgo.com/?q=youtube+crypto+lightning+loop&ia=web Web Search - YouTube Videos] | |
| − | + | [https://www.lnswap.org/learn/how-lnswap-bitcoin-stacks-swaps-work LNSwap - Submarine Swaps] | |
| − | + | [https://github.com/lightninglabs/loop Lightning Loop - Loop In and Loop Out] | |
| − | + | == Selling == | |
| − | + | === Cashing Out Your Crypto Balance === | |
| − | + | ==== Coinbase ==== | |
| − | + | # Sell your crypto to your chosen fiat currency | |
| + | # Click on the fiat currency row | ||
| + | # Use the right hand side SELL OUT box | ||
| + | # Follow the instructions to transfer the money to your bank | ||
| − | + | [https://help.coinbase.com/en/coinbase/trading-and-funding/buying-selling-or-converting-crypto/how-do-i-sell-or-cash-out-my-digital-currency Coinbase - Cash out your balance] | |
| − | + | ==== Binance ==== | |
| − | [https:// | + | [https://www.youtube.com/watch?v=-AlKsBzN1nM&t=21s VIDEO - How to withdraw GBP from Binance using P2P] |
| − | + | '''How to withdraw GBP from Binance using P2P''' | |
| − | + | DO THIS ON YOUR MOBILE PHONE APP | |
| − | + | This is a way to move your money from Binance to an external fiat bank account. It is quite complex but it is '''safe''' because Binance guides you through the process and you do not release you crypto ''until you confirm you have received your fiat to your bank account''. | |
| − | + | # Convert your wallet balance to '''USDT''' | |
| + | # Transfer the amount of USDT you want to withdraw to your Funding account - Assets > Spot > USDT > Transfer > '''Funding''' | ||
| + | # Home > P2P or Icon top left > More Services > Trade > '''P2P''' | ||
| + | # Make sure the currency to want to use is '''GBP''' in the top right next to the horizontal arrows icon | ||
| + | # Click on the '''Sell''' tab and make sure USDT is selected | ||
| + | # This will show you all the '''peers''' or 'buyers' for your crypto | ||
| + | # Click on '''Amount''' to narrow the filter by £x amount - e.g. £10 | ||
| + | # Choose the peer that has the highest amount of '''trades''', completion ratio and 100% feedback | ||
| + | # Click on '''Sell''' button and choose 'By Crypto' | ||
| + | # Select the '''Payment Method''' and Add Bank Account details (you will notice that the ''Sort Code'' is missing) | ||
| + | # Choose the '''amount''' of USDT to sell and click on '''Sell USDT''' | ||
| + | # Now it will show '''Waiting for Buyer's Payment''' | ||
| + | # Keep an eye on the yellow '''chat''' icon for a message from the buyer | ||
| + | # When a message arrives, click on the chat icon and type in your bank's '''Sort Code''' when asked | ||
| + | # Keep '''watching''' for any other messages from the buyer | ||
| + | # Eventually (this took 30 minutes for NatWest) you will see a '''message from Coinbase''' confirming that the £GBP has been sent to your bank account | ||
| + | # Switch to your '''bank app and check''' that the £GBP have arrived from the same name as shown on Binance P2P | ||
| + | # When you are happy, go back to the Binance app and click '''Payment Received''' and confirm twice | ||
| + | # Leave some positive '''feedback''' for the trader and ''that's it!'' | ||
| − | + | == Staking == | |
| − | + | Staking is a process by which individuals lock their cryptocurrency (their "stake") to support the security and operation of a blockchain network. When someone stakes their coins, they are essentially helping to secure the chain and validate transactions on the blockchain. | |
| − | + | Staking is only possible on blockchains such as Ethereum and Cardano based on a proof-of-stake (PoS) consensus mechanism. PoS differs from the proof-of-work (PoW) used in cryptocurrencies such as Bitcoin, where miners use computing power to validate transactions. Staking coins makes users' holdings less liquid because the coins are tied up in the staking process. | |
| − | + | Individuals can usually still access their staked coins but may only be able to use them for other purposes once they are no longer staked. You can unstake your crypto at any time, and your crypto is always yours. | |
| − | + | Example rates ... | |
| − | + | * Solana = 4.35% | |
| + | * Ethereum = 3.29% | ||
| + | * Cardano = 2.00% | ||
| − | + | [https://help.coinbase.com/en/coinbase/coinbase-staking/rewards/earn-rewards-with-staking Coinbase Help - Earn Rewards with Staking] | |
| − | |||
| − | + | [https://academy.binance.com/en/articles/what-is-staking Binance Help - What is Staking?] | |
| − | + | == Stablecoins == | |
| − | + | Stablecoins are tokens pegged to an external asset, such as gold or the U.S. dollar, which ensures price stability. These coins are usually backed by the external asset, commonly USD, minimizing risk. Nonetheless, some stablecoins are collateralized by other cryptocurrencies, which elevates the risk factor. Stablecoins are generally less volatile. For instance, USDC remains fixed at $1 and is supported by numerous financial institutions. In a highly unstable market, stablecoins offer stability by being collateralized. | |
| − | + | * US Dollar Coin (USDC) = 4.60% | |
| − | |||
| − | |||
| − | |||
| − | + | == Wallets == | |
| − | + | ''What is a crypto wallet?'' | |
| − | + | Crypto wallets allow you to store, send, and receive cryptocurrencies. | |
| − | + | Wallets are usually either hot, cold, or centralized: | |
| − | |||
| − | |||
| − | + | * '''Hot wallets''' connect to the internet and are usually easy to use | |
| + | * '''Cold wallets''' do not connect to the internet and offer the best security | ||
| + | * '''Centralized wallets''', such as exchanges, are controlled by third parties | ||
| + | When using a crypto wallet, the crypto is not stored in the wallet but on the blockchain. Crypto wallets use your secret recovery phrase to access and interact with your funds on the blockchain. | ||
| − | + | ''How do Crypto Wallets work?'' | |
| − | + | The beauty of a crypto wallet is down to the fact that it does not store any actual money on it. When you create a crypto wallet, the software (like those listed below) generates a key from a 12 or 24 word 'seed phrase' and embeds this key in the blockchain - so it knows what the wallet is for and what it contains. There is NO name or email address or password involved. This is constantly being verified IN the blockchain and updated to match what you have in your wallet. Which means, you can install ANY crypto wallet software, import your unique 12 word key and your balance will be shown. | |
| − | + | === Seed Phrase Words === | |
| − | + | These words are chosen from a total of [https://github.com/bitcoin/bips/blob/master/bip-0039/english.txt 2048 recovery words] defined in the [https://github.com/bitcoin/bips/blob/master/bip-0039.mediawiki BIP39 standard]. | |
| − | + | This MUST be written down, or '''etched in Steel'''. No seriously, really etched in [https://cryptolisty.com/hardware-wallets/best-crypto-metal-plates-for-recovery-seed-key-and-wallet-backups/ actual steel] - because this is fireproof. Then, this must be kept in a VERY safe place - given to a relative. | |
| − | + | This is your cryptocurrency - those 12 words are the key to your money. | |
| − | + | It's as simple and as paranoid as that. | |
| − | + | === Software (Hot) === | |
| − | + | This is an app running on your phone, tablet or computer which creates a software based wallet | |
| − | https:// | + | [https://www.coinbase.com/en-gb/learn/tips-and-tutorials/how-to-set-up-a-crypto-wallet How To Set Up A Crypto Wallet] |
| − | https:// | + | [https://www.coinbase.com/wallet Coinbase Wallet] |
| − | + | [https://www.exodus.com/ Exodus Wallet] | |
| − | https://www. | + | [https://www.digitaljournal.com/pr/news/cdn-newswire/cryptocurrency-wallet-software-market-an-professional-research-report-2023-2030-exodus-kucoin-zengo-bitstamp Wallets Report] |
| − | https:// | + | [https://www.bitstamp.net/ BitStamp] |
| − | + | [https://zengo.com/ Zengo] | |
| − | + | [https://bluewallet.io/ Blue Wallet with Lightning Pay] | |
| − | + | [https://www.walletofsatoshi.com/ Wallet of Satoshi - Bitcoin Lightning Wallet] | |
| − | + | [https://muun.com/ Muun Wallet] | |
| − | + | === Hardware (Cold) === | |
| − | + | A crypto hardware wallet is a secure physical device for storing and managing cryptocurrency private keys offline. | |
| − | + | https://www.howtogeek.com/804636/best-crypto-hardware-wallet/ | |
| − | + | ==== Electronic Wallets ==== | |
| − | |||
| − | |||
| − | + | [https://trezor.io/trezor-safe-3 Trezor Safe 3] | |
| − | + | ==== Crypto Seed Phrase Secure Storage ==== | |
| − | + | Clever and cheap do it yourself. | |
| − | |||
| − | |||
| − | |||
| − | + | [https://raspibolt.org/guide/bonus/bitcoin/safu-ninja.html Safu Ninja - washers, wingnut] | |
| − | + | Even nicer | |
| − | + | https://incoherency.co.uk/blog/stories/diy-cryptosteel-capsule.html | |
| − | + | Commercial | |
| − | + | https://cryptosteel.com/product/cryptosteel-capsule-solo/ | |
| − | |||
| − | |||
| − | |||
| − | |||
| − | |||
| − | + | https://bitbox.swiss/steelwallet/ | |
| − | + | === Lightning === | |
| − | + | The Lightning Network is designed to make bitcoin transactions as fast and cheap as possible. It is part of a newer class of crypto technologies known as "layer 2" blockchains, which you can think of as being a little like HOV lanes on highways. By offloading some transaction "traffic" to the Lightning Network's "layer 2" blockchain, the core Bitcoin blockchain ("layer 1") can move faster. | |
| − | + | https://bluewallet.io/lightning/ | |
| − | + | === Miscellaneous === | |
| − | + | Desktop wallet | |
| − | + | Sparrow Wallet (https://www.sparrowwallet.com) - superb! | |
| + | Nun-chuk (https://nunchuk.io) | ||
| − | + | Mobile wallet (on-chain) | |
| − | + | Nun-chuk (https://nunchuk.io) | |
| − | + | Mobile wallet (lightning) | |
| − | + | Wallet of Satoshi (https://www.walletofsatoshi.com) | |
| − | + | Phoenix (https://phoenix.acinq.co) | |
| − | + | Muun (https://muun.com) | |
| − | + | Zeus - good for connecting to your own node (https://zeusln.app) | |
| − | |||
| − | |||
| − | |||
| − | |||
| − | + | Atomic swaps (for on-chain to lightning conversion) | |
| − | + | Boltz (https://boltz.exchange/swap) | |
| − | + | Hardware wallets | |
| − | + | Coldcard (https://coldcard.com) - expensive but the best imho | |
| + | Trezor (https://trezor.io) | ||
| + | Ledger (https://www.ledger.com) | ||
| − | + | == Tax == | |
| − | + | [https://www.cointracker.io UK Tax Law - Easily sync wallets and prepare HRMC forms] | |
| − | + | == Hodling == | |
| − | + | Bitcoin hodling is a strategy that involves continuous storage of bitcoins as a way to mitigate volatility and make considerable returns. While this method takes a lot of time to show tangible results and requires patience, it is one of the safest and most solid ways to take advantage of Bitcoin. | |
| − | + | == Spending == | |
| − | + | There are an ever growing number of ways to spend your crypto :-) | |
| − | + | [https://www.bitrefill.com BitRefill] - Buy Vouchers, Gift Cards and Top-Up Mobile Phones with Cryptocurrency! | |
| − | + | == Business and Accepting Payments == | |
| − | + | [https://coinos.io Coinos] - an easy Bitcoin web wallet for shops | |
| − | + | [https://bridge2bitcoin.com/why-accept-bitcoin/ Bridge 2 Bitcoin] - why accept Bitcoin in my Business? | |
| − | |||
| − | |||
| − | + | == Node == | |
| − | + | What Is A Full Node? | |
| − | + | A full node is a program that fully validates transactions and blocks. Almost all full nodes also help the network by accepting transactions and blocks from other full nodes, validating those transactions and blocks, and then relaying them to further full nodes. | |
| − | + | Most full nodes also serve lightweight clients by allowing them to transmit their transactions to the network and by notifying them when a transaction affects their wallet. If not enough nodes perform this function, clients won’t be able to connect through the peer-to-peer network—they’ll have to use centralized services instead. | |
| − | + | Many people and organizations volunteer to run full nodes using spare computing and bandwidth resources—but more volunteers are needed to allow Bitcoin to continue to grow. | |
| − | + | === Bitcoin Node === | |
| − | https:// | + | https://mynodebtc.com/ |
| − | + | https://bitcoin.org/en/full-node#what-is-a-full-node | |
| − | + | ==== Umbrel ==== | |
| − | + | Install ubuntu on a [https://thepihut.com/products/raspberry-pi-5 Raspberry Pi 5] with a business grade NVMe SSD and well ventilated case (like the [https://thepihut.com/products/argon-one-v3-m-2-nvme-raspberry-pi-5-case Argon M.2 v3]) then run the script ... | |
| − | + | curl -L <nowiki>https://umbrel.sh</nowiki> | bash | |
| − | https:// | + | https://umbrel.com |
| − | === | + | === Lightning Node === |
| − | + | https://mynodebtc.com/ | |
| − | + | https://github.com/lightningnetwork/lnd | |
| − | |||
| − | |||
| − | |||
| − | |||
| − | + | https://www.bitcoinmarketjournal.com/bitcoin-lightning-network-node/ | |
| − | . | + | https://github.com/ACINQ/eclair |
| − | + | [https://zeusln.app/ Zeus Wallet - connects to your own Lightning node] | |
| − | |||
| − | |||
| − | + | ==== Liquidity ==== | |
| − | |||
| − | |||
| − | ... | + | [https://amboss.space/magma Magma by Amboss - Buy Inbound Liquidity] |
| + | |||
| + | [https://apotdevin.com/blog/thunderhub-rebalance How To Rebalance Your Lightning Node Channels] | ||
| + | |||
| + | ==== Security and Safety ==== | ||
| + | |||
| + | [https://bitcoinmagazine.com/guides/how-to-set-up-watchtower-lightning-node Watchtower] | ||
| − | + | == Mining == | |
| − | ''' | + | '''What is Bitcoin Mining?''' |
| − | + | Bitcoin mining is the process of adding new transactions to the blockchain, a public ledger of all Bitcoin transactions. This is done by using powerful computers to solve complex mathematical equations that verify the authenticity of the transactions and add them to the blockchain. Miners are rewarded with newly created bitcoins for their efforts, known as a "block". | |
| − | ''' | + | '''What is Cryptocurrency Mining?''' |
| − | + | Cryptocurrency mining is the process of validating transactions and adding them to a blockchain by solving complex mathematical puzzles, typically done using powerful computers to earn rewards. | |
| − | + | Mining is the process that Bitcoin and several other cryptocurrencies use to generate new coins and verify new transactions. It involves vast, decentralized networks of computers around the world that verify and secure blockchains - the virtual ledgers that document cryptocurrency transactions. | |
| − | + | The more powerful your computer, the more "hash rate" it has and can contribute a higher percentage of solving the puzzle and gain a higher reward. | |
| − | |||
| − | |||
| − | + | Crypto mining is a calculation-intensive, puzzle-solving-like computation process that requires high processing power along with high electricity consumption. The miner who first solves the puzzle gets to place the next block on the blockchain and claim the rewards. Rewards include the miner becoming the owner of the newly released bitcoin, or getting fees linked to the transactions performed in the block. | |
| − | + | At the earliest days of the mining, any processor or GPU had the sufficient power required for finding many solutions per day and getting a reward for the detected block. | |
| − | + | With an increase of the interest in cryptocurrencies, the difficulty level of the "puzzles" also increased, and a standalone PC could not find many solutions anymore. | |
| − | + | Difficulty level was rising because the reward for the newfound block was growing as well as its equivalent in value. That was the time when miners decided to unite their efforts and create the mining pools. | |
| − | + | Therefore, even weak devices that are working simultaneously on solving the same "puzzle" have a chance to find its solution which would enable miners to create a new block. | |
| − | + | Mining pools get solutions from all the connected miners, and if one of those numerous solutions appears to be a proper one, the pool gets a reward for the created block. This reward is shared proportionally to the efforts applied by the miners and forwarded to their wallets. | |
| − | + | ||
| − | + | Farm > Rig > Worker | |
| − | + | ||
| − | + | The miner, or worker, can be either CPU, GPU or ASIC based. | |
| − | + | ||
| − | + | * CPU = Central Processing Unit | |
| − | + | * GPU = Graphics Processing Unit | |
| + | * ASIC = Application Specific Integrated Circuit | ||
| − | + | Today, there are thousands of dedicated farms around the world running millions of rigs. | |
| − | + | '''How Many Bitcoins Are There?''' | |
| − | + | * 19,489,350 = Total BTC in Existence | |
| − | + | * 1,510,650 = Bitcoins Left to Be Mined | |
| − | + | * 92.806% = Percentage of Bitcoins Issued | |
| − | + | * 900 = New Bitcoins per Day | |
| − | + | ||
| − | + | === Hash Rate === | |
| − | + | ||
| − | + | '''How Is The Hash Rate Measured & its Unit?''' | |
| − | + | ||
| − | + | Hash rate is a unit measured in hashes per second or [h/s] and here are some usual denominations used to refer it. | |
| − | + | ||
| − | + | '''Hash rate denominations''' | |
| − | + | ||
| − | + | 1 kH/s is 1,000 (one thousand) hashes per second - "''kilohash''". | |
| − | + | 1 MH/s is 1,000,000 (one million) hashes per second - "''megahash''". | |
| − | + | 1 GH/s is 1,000,000,000 (one billion) hashes per second - "''gigahash''". | |
| − | + | 1 TH/s is 1,000,000,000,000 (one trillion) hashes per second - "''terahash''". | |
| − | + | 1 PH/s is 1,000,000,000,000,000 (one quadrillion) hashes per second - "''petahash''". | |
| − | + | 1 EH/s is 1,000,000,000,000,000,000 (one quintillion) hashes per second - "''extahash''". | |
| − | |||
| − | |||
| − | |||
| − | |||
| − | |||
| − | |||
| − | |||
| − | |||
| − | |||
| − | |||
| − | |||
| − | |||
| − | |||
| − | |||
| − | |||
| − | |||
| − | |||
| − | |||
| − | |||
| − | |||
| − | |||
| − | |||
| − | + | === List of Mining Pools === | |
| + | |||
| + | [https://miningpoolstats.stream/ Mining Pool Stats] | ||
| + | |||
| + | [https://wheretomine.io/pools/all Where To Mine] | ||
| + | |||
| + | [https://pool.braiins.com/ Braiins Pool] - superb! | ||
| + | |||
| + | [https://bitcoinmagazine.com/business/volcano-energy-bitcoin-mining-pool-goes-live NEWS / Volcanic El Salvador Mining Pool] | ||
| + | |||
| + | [https://luxor.tech/ Luxor Technologies Volcanic Energy Mining Pool] | ||
| − | + | === Coins To Mine === | |
| − | + | [https://minerstat.com/coins MinerStat] | |
| − | + | [https://www.coingecko.com/ Coin Gekko] | |
| − | + | ==== Bitcoin ==== | |
| − | + | ||
| − | + | ... | |
| − | + | ||
| − | + | ==== Ethereum ==== | |
| − | + | ||
| − | + | ... | |
| − | + | ||
| − | + | ==== Dynex ==== | |
| − | + | ||
| − | + | https://dynexcoin.medium.com/dynex-how-to-setup-a-node-and-local-dnx-wallet-3cf99e099820 | |
| − | + | ||
| − | + | https://dynexcoin.medium.com/how-to-mine-dnx-on-hiveos-81e2824f2476 | |
| − | + | ||
| − | + | === Rainbow Miner === | |
| − | + | ||
| − | + | [https://rbminer.net Rainbow Miner] '''completely automates the mining experience''' by analysing your CPU and GPU then testing it on all the pools. It will then report back with the most profitable combination of '''Pool + Coin + Miner + Algorithm''' to get you the best BTC revenue return. Just, amazing. | |
| − | + | ||
| − | + | There is a version for all operating systems, a simple step-by-step guide, nice command line and web interface. It has doubled my returns for my low-end NVIDIA GTX 1060 3GB cards using NiceHash + BTC + MiniZ + ZHash. | |
| − | + | ||
| − | + | LOCKED | |
| − | + | to NiceHash-Equihash24x5- | |
| − | + | (press L to unlock) | |
| − | + | ||
| − | + | Last Speed Active Started Miner Algorithm Coin Device Pool Power Command | |
| − | + | ---------- ------ ------- ----- --------- ---- ------ ---- ----- ------- | |
| − | + | 75.19 H/s 00d/16h/42m 3 Times MiniZ Equihash (144,5) - GTX 1060 3GB NiceHash 220W Bin/NVIDIA-MiniZ/miniZ --nvidia | |
| − | + | --telemetry=33020 -cd 0 1 --url=NHbLd5exQeCGGy | |
| − | + | WnopVoLHLbzexKN5z8iq7p.paullyrainbowminer@zhas | |
| − | + | h.auto.nicehash.com:9200 -p x --pers=auto | |
| − | + | --gpu-line --extra --latency --nocolor | |
| − | + | --nohttpheaders --par=144,5 | |
| − | + | ||
| − | + | [https://rbminer.net/get-started/ Quick Start] | |
| − | + | ||
| − | + | [https://rbminer.net/documentation/ Documentation] | |
| − | + | ||
| − | + | ''How do I add RainbowMiner's start script to crontab on Linux for autostart?'' | |
| − | + | ||
| − | + | As the user that will be running RainbowMiner, edit the crontab file using crontab -e. You will be promped to select the editor you want to use (emacs, vi, etc.) Add one of the following lines to the end of the file and save: - @reboot /PATH_TO_RAINBOWMINER/start-screen.sh If you want RainbowMiner to start in a separate screen - '''@reboot /PATH_TO_RAINBOWMINER/start-nohup.sh''' If you want RainbowMiner to run as a background process where PATH_TO_RAINBOWMINER is the RainbowMiner installation directory. | |
| − | + | ||
| − | + | === GPU Mining Rig === | |
| − | + | ||
| − | + | * Frame | |
| − | + | * Motherboard | |
| − | + | * CPU | |
| − | + | * RAM | |
| − | + | * Power Supply | |
| − | + | * Cables | |
| − | + | * PCIe Riser Boards | |
| − | + | * Graphics Cards | |
| − | |||
| − | + | '''Frame''' | |
| − | + | [https://www.ebay.co.uk/itm/165984539877 12 GPU Mining Rig Frame] | |
| − | |||
| − | + | '''Motherboard''' | |
| − | + | [https://www.asrock.com/mb/Intel/H110%20Pro%20BTC+/index.asp ASRock H110 Pro BTC+] | |
| − | + | [https://www.ebay.co.uk/itm/295711139994 Ebay Item] | |
| + | |||
| + | '''CPU''' | ||
| + | |||
| + | 4 × Intel(R) Core(TM) i3-6100 CPU @ 3.70GHz | ||
| − | + | '''RAM''' | |
| − | + | 8GB | |
| − | + | '''Power Supply''' | |
| − | + | [https://www.ebay.co.uk/itm/125299806061 1800W Mining Power Supply Cooling PSU For 8GPU ATX BTC Eth Rig Ethereum Miner ~ £60] | |
| − | + | '''Cables''' | |
| − | + | '''PCIe Riser Boards''' | |
| − | |||
| − | |||
| − | + | [https://www.ebay.co.uk/itm/385731522628 VER009S PCI-E Riser Card PCIe 1x to 16x USB 3.0 Data Cable Mining RVN Minin UK] | |
| − | + | '''Graphics Cards''' | |
| − | + | # NVIDIA 1080 x 6 | |
| + | # AMD RX580 x 6 | ||
| − | + | '''Coin''' | |
| − | + | ||
| − | + | [https://btg.2miners.com/ Bitcoin Gold at 2Miners] | |
| − | + | ||
| − | + | === Hard Drive Mining === | |
| − | + | ||
| − | + | What Is Hard Drive Mining? | |
| − | + | ||
| + | Hard drive mining is a way of generating cryptocurrency using the storage space of hard disk drives. HDD miners do not require graphics processing units (GPUs) or ASIC miners, like in traditional mining farms, to produce new blocks in the distributed ledger. Instead, this method uses a set of hard disk drives and unused storage space, also known as proof of capacity. | ||
| − | + | Practically any device with loads of storage space can be used in HDD mining, as it needs less computational power than the Proof of Work, thus using less energy in the long term. New data blocks are generated when miners use their hard disks in the distributed ledger and, accordingly, get rewarded. | |
| − | + | https://coindoo.com/hard-drive-mining/ | |
| − | + | ==== Chia ==== | |
| − | |||
| − | |||
| − | |||
| − | |||
| − | |||
| − | |||
| − | |||
| − | |||
| − | |||
| − | |||
| − | |||
| − | |||
| − | |||
| − | |||
| − | |||
| − | |||
| − | |||
| − | |||
| − | |||
| − | |||
| − | |||
| − | |||
| − | |||
| − | |||
| + | [https://www.chia.net/ Chia] is a cryptocurrency and blockchain with smart transaction capabilities. It was designed from the ground up to make cryptocurrency easier to use (and harder to lose) than cash. | ||
| − | + | The 'Proof of Space and Time' is the only Nakamoto consensus algorithm since Proof of Work, while also having a much lower energy consumption. Part of Chia's vision involves improving the carbon footprint of the blockchain industry. | |
| − | + | ===== Chia Buying ===== | |
| − | + | https://coincodex.com/how-to-buy-chia-network/ | |
| − | + | ===== Chia Farming ===== | |
| − | + | [https://xch.farm/basics/ CHIA FARMING BASICS] | |
| − | + | Chia plotting and farming can seem daunting at first, but it's a relatively straightforward process: | |
| − | + | # Obtain hardware | |
| + | # Install Chia | ||
| + | # Run and configure Chia | ||
| + | # Create a plot | ||
| + | # Start farming | ||
| − | + | '''Pools and Payouts''' | |
| − | |||
| − | |||
| − | |||
| − | |||
| − | |||
| − | |||
| − | |||
| − | |||
| − | |||
| − | |||
| − | |||
| − | |||
| − | |||
| − | |||
| − | |||
| − | |||
| − | |||
| − | |||
| − | ''' | + | When you join a pool, you are given a 'payout address' which is generated from your main 'Chia Wallet'. |
| − | + | When you farm to a pool, you gradually build up mojo and when the minimum amount of mojo has been farmed (or mined) then the Pool will payout to your address. | |
| + | |||
| + | You then view your wallet balance and can send your mojos to an external exchange address. | ||
| + | |||
| + | To make this process quicker, you can change your Pool's payout address to that external exchange address. | ||
| + | |||
| + | Here are the cli commands to do all of this in the Linux terminal:- | ||
| + | |||
| + | 1. Make sure your database in fully synced ... | ||
| + | chia show --state | ||
| − | chia | + | 2. Show your wallet with the balance ... |
| + | chia wallet show | ||
| − | + | 3. Show the pools you have joined and are mining to ... | |
| + | chia plotnft show | ||
| − | + | 4. Change the pool's payout address ... | |
| − | chia | + | chia plotnft change_payout_instructions --launcher_id 2bb32xxxxxxxxxxxxxxxxxxxxxxxxxxxxxxx62738a --address xch1xxxxxxxxxxxxxxxxxxxxxxxxxxxxxxxxxxxxx95m4 |
| − | + | 5. Send mojos to an external address ... | |
| + | chia wallet send --amount 0.002261969048 --fee 0.000000000001 --address xch1xxxxxxxxxxxxxxxxxxxxxxxxxxxxxxxxxxxxx95m4 | ||
| − | + | '''Hardware''' | |
| − | |||
| − | + | ... own built ... | |
| − | + | * Raspberry Pi 4 4GB or [https://www.androidpimp.com/embedded/nanopc-t4/ NanoPC T4] | |
| − | + | * nVME or SSD Drive for the OS and plotting | |
| − | + | * xTB Hard Disk Drive for the storage | |
| − | + | ||
| − | + | NanoPC T4 | |
| − | + | * https://wiki.friendlyelec.com/wiki/index.php/NanoPC-T4#Boot_from_SD_Card | |
| − | + | * https://drive.google.com/drive/folders/1XuQJbgdFupQy8DjJTQD7iufgYbMNAX9A | |
| − | + | ||
| − | + | DISKS | |
| − | + | ||
| − | + | k=32 is now the minimum plot size that will be eligible for mainnet at the end of the year. More here. | |
| − | |||
| − | |||
| − | |||
| − | |||
| − | |||
| − | |||
| − | |||
| − | |||
| − | |||
| − | |||
| + | Storage requirements | ||
| − | + | K-size Temp. Size Final Size | |
| + | K=32 239 GiB (256.6 GB) 101.4 GiB (108.9 GB) | ||
| + | K=33 512 GiB (550 GB) 208.8 GiB (224.2 GB) | ||
| + | K=34 1041 GiB (1118 GB) 429.8 GiB (461.5 GB) | ||
| + | K=35 2175 GiB (2335 GB) 884.1 GiB (949.3 GB) | ||
| − | + | When planning on how much plotting space is required, only calculate the temporary disk size requirement. | |
| − | |||
| − | |||
| − | |||
| − | |||
| − | |||
| − | |||
| − | |||
| − | |||
| − | |||
| − | |||
| − | |||
| − | |||
| − | |||
| + | I followed these instructions ... | ||
| − | + | https://chiadecentral.com/nuc-small-form-factor-plotting-build/ | |
| + | * SD = Operating System Drive (/dev/mmcblk1) | ||
| + | * SSD = Temporary Plotting Drive (/dev/nvme0n1) | ||
| + | * HDD = Permanent Storage Drive (/dev/sda) | ||
| + | dmesg | ||
| + | lsblk | ||
| + | ll /dev/nvme0n1 | ||
| + | apt -y install xfsprogs | ||
| + | mkfs.xfs /dev/nvme0n1 | ||
| + | mkdir /mnt/ssd | ||
| + | mount -v -t xfs -o discard /dev/nvme0n1 /mnt/ssd | ||
| + | ll /dev/sda | ||
| + | mkfs.ext4 -m 0 -T largefile4 -L chia-plots /dev/sda | ||
| + | mkdir /mnt/hdd | ||
| + | mount -v -t ext4 /dev/sda /mnt/hdd | ||
| + | nano /etc/fstab | ||
| + | /dev/nvme0n1 /mnt/ssd xfs defaults 0 0 | ||
| + | /dev/sda /mnt/hdd ext4 defaults 0 0 | ||
| + | reboot | ||
| − | + | ... prebuilt ... | |
| − | + | [https://evergreenminer.com/ EverGreen Chia Mining Box] | |
| − | + | '''Software''' | |
| − | + | * official Chia OS for Windows, macOS, Linux and Raspberry Pi (or similar ARM based SoC) | |
| − | + | '''Instructions''' | |
| − | + | [https://docs.chia.net/introduction Introduction] | |
| − | + | '''CLI''' | |
| − | + | * https://docs.chia.net/installation#cli | |
| + | * https://docs.chia.net/cli/ | ||
| + | * https://github.com/Chia-Network/chia-blockchain/wiki/CLI-Commands-Reference | ||
| − | + | PREPARE | |
| − | + | Download the huge ~80Gb database file, for use later ... | |
| − | + | * https://www.chia.net/downloads/#database-checkpoint | |
| − | + | INSTALL | |
| − | + | As root user ... | |
| − | https:// | + | sudo -i |
| + | apt-get install ca-certificates curl gnupg | ||
| + | curl -sL <nowiki>https://repo.chia.net/FD39E6D3.pubkey.asc</nowiki> | gpg --dearmor -o /usr/share/keyrings/chia.gpg | ||
| + | apt-get update | ||
| + | echo "deb [arch=$(dpkg --print-architecture) signed-by=/usr/share/keyrings/chia.gpg] <nowiki>https://repo.chia.net/debian/</nowiki> stable main" | tee /etc/apt/sources.list.d/chia.list | ||
| + | apt-get update | ||
| + | apt-get install chia-blockchain-cli | ||
| + | logout | ||
| − | + | TEST | |
| − | + | As regular user ... | |
| − | + | which chia | |
| − | + | chia version | |
| − | + | chia --help | |
| − | + | ||
| − | + | Usage: chia [OPTIONS] COMMAND [ARGS]... | |
| − | + | ||
| − | + | Manage chia blockchain infrastructure (2.1.0) | |
| − | + | ||
| − | + | Options: | |
| − | + | --root-path PATH Config file root [default: | |
| − | + | /home/plittlefield/.chia/mainnet] | |
| − | + | --keys-root-path PATH Keyring file root [default: | |
| − | + | /home/plittlefield/.chia_keys] | |
| − | + | --passphrase-file FILENAME File or descriptor to read the keyring | |
| − | + | passphrase from | |
| − | + | -h, --help Show this message and exit. | |
| − | + | ||
| − | + | Commands: | |
| − | + | completion Generate shell completion | |
| − | + | configure Modify configuration | |
| − | + | data Manage your data | |
| − | + | db Manage the blockchain database | |
| − | + | dev Developer commands and tools | |
| − | + | farm Manage your farm | |
| − | + | init Create or migrate the configuration | |
| − | + | keys Manage your keys | |
| + | netspace Estimate total farmed space on the network | ||
| + | passphrase Manage your keyring passphrase | ||
| + | peer Show, or modify peering connections | ||
| + | plotnft Manage your plot NFTs | ||
| + | plots Manage your plots | ||
| + | plotters Advanced plotting options | ||
| + | rpc RPC Client | ||
| + | run_daemon Runs chia daemon | ||
| + | show Show node information | ||
| + | start Start service groups | ||
| + | stop Stop services | ||
| + | version Show chia version | ||
| + | wallet Manage your wallet | ||
| + | |||
| + | Try 'chia start node', 'chia netspace -d 192', or 'chia show -s' | ||
| − | + | START | |
| − | + | Set up the configuration ... | |
| − | + | chia init | |
| − | + | Which will create these directories and files ... | |
| − | + | /home/user/.chia | |
| − | + | `-- mainnet | |
| − | + | |-- config | |
| − | + | | |-- config.yaml | |
| − | + | | |-- config.yaml.lock | |
| − | + | | `-- ssl | |
| − | + | | |-- ca | |
| − | + | | | |-- chia_ca.crt | |
| − | + | | | |-- chia_ca.key | |
| − | + | | | |-- private_ca.crt | |
| − | + | | | `-- private_ca.key | |
| − | + | | |-- crawler | |
| − | + | | | |-- private_crawler.crt | |
| − | + | | | `-- private_crawler.key | |
| − | + | | |-- daemon | |
| − | + | | | |-- private_daemon.crt | |
| − | + | | | `-- private_daemon.key | |
| − | + | | |-- data_layer | |
| − | + | | | |-- private_data_layer.crt | |
| − | + | | | |-- private_data_layer.key | |
| − | + | | | |-- public_data_layer.crt | |
| − | + | | | `-- public_data_layer.key | |
| − | + | | |-- farmer | |
| − | + | | | |-- private_farmer.crt | |
| − | + | | | |-- private_farmer.key | |
| − | + | | | |-- public_farmer.crt | |
| − | + | | | `-- public_farmer.key | |
| − | + | | |-- full_node | |
| + | | | |-- private_full_node.crt | ||
| + | | | |-- private_full_node.key | ||
| + | | | |-- public_full_node.crt | ||
| + | | | `-- public_full_node.key | ||
| + | | |-- harvester | ||
| + | | | |-- private_harvester.crt | ||
| + | | | `-- private_harvester.key | ||
| + | | |-- introducer | ||
| + | | | |-- public_introducer.crt | ||
| + | | | `-- public_introducer.key | ||
| + | | |-- timelord | ||
| + | | | |-- private_timelord.crt | ||
| + | | | |-- private_timelord.key | ||
| + | | | |-- public_timelord.crt | ||
| + | | | `-- public_timelord.key | ||
| + | | `-- wallet | ||
| + | | |-- private_wallet.crt | ||
| + | | |-- private_wallet.key | ||
| + | | |-- public_wallet.crt | ||
| + | | `-- public_wallet.key | ||
| + | `-- db | ||
| + | `-- blockchain_v2_mainnet.sqlite | ||
| + | |||
| + | 14 directories, 35 files | ||
| − | If | + | Then unpack the downloaded ~100Gb database file to the ~/.chia/mainnet/db directory ... |
| + | |||
| + | tar -xzvf mainnet.2023-10-01.tar.gz --directory ~/.chia/mainnet/db | ||
| + | mv ~/.chia/mainnet/db/./blockchain_v2_mainnet.2023-06-30.sqlite ~/.chia/mainnet/db/blockchain_v2_mainnet.sqlite | ||
| + | |||
| + | Or, if you have downloaded on another computer, then you can rsync it across your local network with these LARGE FILE tweaks ... | ||
| + | |||
| + | rsync --inplace --partial -zavP /home/myuser/.chia/mainnet/db/ nanopc-t4-1:/mnt/ssd/chia/mainnet/db/ | ||
| + | |||
| + | Generate keys ... | ||
| + | |||
| + | If you don't have a key and wallet already ... | ||
| + | |||
| + | chia keys generate | ||
| − | + | If you want to use an existing key and wallet ... | |
| − | |||
| − | |||
| − | |||
| − | |||
| − | |||
| − | |||
| − | |||
| − | |||
| − | |||
| − | |||
| − | |||
| − | |||
| − | |||
| − | |||
| − | |||
| − | |||
| − | |||
| − | |||
| − | |||
| − | |||
| − | |||
| − | |||
| − | |||
| − | |||
| − | + | chia keys add | |
| − | + | Check your keys with ... | |
| − | + | chia keys show | |
| − | |||
| − | + | Show your seed phrase with ... | |
| − | |||
| − | |||
| − | |||
| − | + | chia keys show --show-mnemonic-seed | |
| − | + | Edit the config file, and change the database_path under the full_node to match your ~100Gb database file name ... | |
| − | + | rm ~/.chia/mainnet/config/config.yaml.lock | |
| + | nano ~/.chia/mainnet/config/config.yaml | ||
| + | database_path: db/blockchain_v2_mainnet.sqlite | ||
| − | + | Start the farmer ... | |
| − | + | chia start farmer | |
| − | + | Check status, and it should show the Syncing as nearly complete ... | |
| − | + | chia show --state | |
| + | |||
| + | Network: mainnet Port: 8444 RPC Port: 8555 | ||
| + | Node ID: 37b42984f49a9ce0b9fd04321d6e2c85cbdfe3a5c63c5e2afdefce7c649c0f4f | ||
| + | Genesis Challenge: ccd5bb71183532bff220ba46c268991a3ff07eb358e8255a65c30a2dce0e5fbb | ||
| + | Current Blockchain Status: '''Syncing 4310193/4341308''' (31115 behind). | ||
| + | Peak: Hash: 8f8d60f439d633bb5a8cbf82de4f4d7480e0334ef7109fc5bab332a91b345b3a | ||
| + | Time: Mon Oct 02 2023 00:01:22 BST Height: 4310193 | ||
| − | + | There, you've just saved yourself 3 days waiting :) | |
| − | + | Eventually, you will receive a 'Full Node Synced' message ... | |
| − | + | chia show --state | |
| + | |||
| + | Network: mainnet Port: 8444 RPC Port: 8555 | ||
| + | Node ID: 37b42984f49a9ce0b9fd04321d6e2c85cbdfe3a5c63c5e2afdefce7c649c0f4f | ||
| + | Genesis Challenge: ccd5bb71183532bff220ba46c268991a3ff07eb358e8255a65c30a2dce0e5fbb | ||
| + | Current Blockchain Status: '''Full Node Synced''' | ||
| + | |||
| + | Peak: Hash: dc99c1219ce925747c6028ab2c8b7b1d235e811b77251c5a8151d5c90697989e | ||
| + | Time: Sun Oct 08 2023 20:28:46 BST Height: 4341814 | ||
| + | |||
| + | Estimated network space: 29.678 EiB | ||
| + | Current difficulty: 2672 | ||
| + | Current VDF sub_slot_iters: 147849216 | ||
| + | |||
| + | Height: | Hash: | ||
| + | 4341814 | dc99c1219ce925747c6028ab2c8b7b1d235e811b77251c5a8151d5c90697989e | ||
| + | 4341813 | 1f9417bbc9f2776d6880fb3a03618776162297f2eb3369e9396e0a1b9f559b3e | ||
| + | 4341812 | 9e7526e71c4f315c72a7975a399cf7566ba50dd4257729997ce6041c052f6caa | ||
| + | 4341811 | 1d9ded9981d08d475bd8c52f886b93e18ef0b56161ed0d05c8e4603d1872131e | ||
| + | 4341810 | e05bec2ef568225ce50fe1eda2e06a2d863a2959e2890f7a6b4d777394da1bb1 | ||
| + | 4341809 | 6534fd46f6153e5772244e1b9c644bf185d3bbee306f371f5b392ab49927b25f | ||
| + | 4341808 | c14449b83280c7f5734aba234b3756b6ed71278781cb71157c8d9dc603927cf1 | ||
| + | 4341807 | 5fc3b07c6bb30678fdbe55d93ae49ac47b48f65c8f1c3b3a2d343ca8d4adfcbd | ||
| + | 4341806 | 2ce9ed9ade9700705c300f091c0446ed33a633d35bcbad0d66a6508b3ef1f130 | ||
| + | 4341805 | 93c46d0f5368628563f3b39b0c2860bad349e63a25c5fa54ab48dd18d0d55cec | ||
| − | |||
| − | + | NEED TO WRITE UP THE WHOLE FAUCET THING BY CLI | |
| + | |||
| + | '''WALLET''' | ||
| + | |||
| + | chia wallet show | ||
| + | |||
| + | '''POOLS''' | ||
| + | |||
| + | https://chia.foxypool.io/ | ||
| − | + | Connect to a pool using your 1 mojo from the faucet ... | |
| − | + | chia plotnft create -s pool -u <nowiki>https://eu1.pool.space</nowiki> -m 0.000000000001 | |
| − | + | Check after 5 minutes ... | |
| − | + | chia plotnft show | |
| − | + | ||
| − | + | Wallet height: 4346464 | |
| − | + | Sync status: Synced | |
| − | + | Wallet ID: 3 | |
| − | + | Current state: FARMING_TO_POOL | |
| − | + | Current state from block height: 4296262 | |
| − | + | Launcher ID: 57d0a97fec7fa6b1ae12aa9d910836a4d680749148808661944d634bdaed74e8 | |
| − | + | Target address (not for plotting): xch19ukfhgdjx9w5zw5jkhcrf7sr9qkvhgtk0lv6u7c5m9ptj60dt4tscqkmna | |
| − | + | Number of plots: 0 | |
| − | + | Owner public key: 8a972c7e5a0966fd9e83d71d68ae9cd6c524ea64ba4c2a6ac0178c0c69406d2678411d220926129b4004d07bbc83dd5f | |
| − | + | Pool contract address (use ONLY for plotting - do not send money to this address): xch1wtgw6rzvnqzn8c93scg04qzzft3539aqwd5fz7exp3vlawq8syaqjqm6ne | |
| − | + | Current pool URL: <nowiki>https://eu1.pool.space</nowiki> | |
| − | + | Current difficulty: 1 | |
| − | + | Points balance: 0 | |
| − | + | Points found (24h): 0 | |
| − | + | Percent Successful Points (24h): 0.00% | |
| − | + | Payout instructions (pool will pay to this address): xch1e86h67gwnheq4aeg65pln2grvyrsl90c58hkhtnjf47t4qk5sm0skm9eju | |
| − | + | Relative lock height: 64 blocks | |
| − | |||
| − | |||
| − | |||
| − | + | '''PLOT''' | |
| − | + | Syntax ... | |
| − | |||
| − | |||
| − | |||
| − | |||
| − | |||
| − | |||
| − | |||
| − | + | chia plotters software -t <temp dir> -d <destination dir> -f <farmer key> -c <contract address> -k <size> -n <number of plots> | |
| − | + | e.g. | |
| − | + | chia plotters madmax -t <temp dir> -d <destination dir> -f <farmer key> -c <contract address> -k <size> -n <number of plots> | |
| + | chia plotters chiapos -t <temp dir> -d <destination dir> -f <farmer key> -c <contract address> -k <size> -n <number of plots> | ||
| − | + | Obtain your farmer key and contract address from ... | |
| − | + | chia keys show |grep 'Farmer' | |
| − | + | chia plotnft show |grep 'contract' | |
| − | |||
| − | + | Now you can actually start plotting ... | |
| − | + | chia plotters madmax -t /mnt/ssd/chia/temp/ -d /mnt/ssd/chia/plots/ -f 93c479a2de1e982f6b8cc15373e67ff851bf916ac10e91cb2cf1c512214a262697e9144a4a2202bd6e1c0a389779788d -c xch1wtgw6rzvnqzn8c93scg04qzzft3539aqwd5fz7exp3vlawq8syaqjqm6ne -k 32 -n 1 | |
| + | |||
| + | Multi-threaded pipelined Chia k32 plotter - 2092041 | ||
| + | Network Port: 8444 | ||
| + | Final Directory: /mnt/ssd/chia/plots/ | ||
| + | Number of Plots: 1 | ||
| + | Crafting plot 1 out of 1 (2023/10/09 21:02:40) | ||
| + | Process ID: 111640 | ||
| + | Number of Threads: 4 | ||
| + | Number of Buckets P1: 2^8 (256) | ||
| + | Number of Buckets P3+P4: 2^8 (256) | ||
| + | Pool Puzzle Hash: 72d0ed0c4c980533e0b18610fa80424ae34897a07368917b260c59feb807813a | ||
| + | Farmer Public Key: 93c479a2de1e982f6b8cc15373e67ff851bf916ac10e91cb2cf1c512214a262697e9144a4a2202bd6e1c0a389779788d | ||
| + | Working Directory: /mnt/ssd/chia/temp/ | ||
| + | Working Directory 2: /mnt/ssd/chia/temp/ | ||
| + | Plot Name: plot-k32-2023-10-09-21-02-1743d30146802207b7ea48945d631d430118fa0ad9e7245d84ca97f31f653115 | ||
| + | |||
| + | [P1] Table 1 took 175.051 sec | ||
| + | Progress update: 0.01 | ||
| + | [P1] Table 2 took 928.383 sec, found 4294918581 matches | ||
| + | Progress update: 0.06 | ||
| − | + | '''MadMax is VERY CPU intensive and can quickly cause issues.''' | |
| − | |||
| − | |||
| − | |||
| − | |||
| − | |||
| − | |||
| − | |||
| − | |||
| − | |||
| − | |||
| − | |||
| − | |||
| − | + | The original plotter 'chiapos' is less intensive ... | |
| − | + | chia plotters chiapos -t /mnt/ssd/chia/temp -d /mnt/hdd/chia/plots -f 93c479a2de1e982f6b8cc15373e67ff851bf916ac10e91cb2cf1c512214a262697e9144a4a2202bd6e1c0a389779788d -c xch1dp7qxxfhwq6s4ed2psn9mxk4rw0fpzk02elm82w3wqr2eg4rqfcqhtp725 -k 32 -n 1 | |
| + | Check with ... | ||
| − | + | chia farm summary | |
| − | + | ||
| − | + | Farming status: Farming | |
| − | + | Total chia farmed: 0.0 | |
| − | + | User transaction fees: 0.0 | |
| + | Block rewards: 0.0 | ||
| + | Last height farmed: 0 | ||
| + | Local Harvester | ||
| + | 0 plots of size: 0.000 MiB on-disk, 0.000 MiBe (effective) | ||
| + | Plot count for all harvesters: 0 | ||
| + | Total size of plots: 0.000 MiB, 0.000 MiBe (effective) | ||
| + | Estimated network space: 29.587 EiB | ||
| + | Expected time to win: Never (no plots) | ||
| + | Note: log into your key using 'chia wallet show' to see rewards for each key | ||
| + | |||
| + | UPDATE - NOVEMBER 2023 - NEW COMMAND | ||
| − | + | This stops the error 'unhandled exception'... | |
| − | + | Starting phase 3/4: Compression from tmp files into "/mnt/ssd/chia/temp/plot-k32-2023-11-06-09-45-23926d44e35588e3407f2937f0a5e9bbbbf34120b8ba72443bd5320b738bf4a5.plot.2.tmp" ... Tue Nov 7 08:21:53 2023 | |
| + | Compressing tables 1 and 2 | ||
| + | Progress update: 0.660 | ||
| + | Caught plotting error: std::bad_alloc | ||
| + | Traceback (most recent call last): | ||
| + | File "chia/cmds/chia.py", line 139, in <module> | ||
| + | File "chia/cmds/chia.py", line 135, in main | ||
| + | File "click/core.py", line 1130, in __call__ | ||
| + | File "click/core.py", line 1055, in main | ||
| + | File "click/core.py", line 1657, in invoke | ||
| + | File "click/core.py", line 1404, in invoke | ||
| + | File "click/core.py", line 760, in invoke | ||
| + | File "click/decorators.py", line 26, in new_func | ||
| + | File "chia/cmds/plotters.py", line 17, in plotters_cmd | ||
| + | File "chia/plotters/plotters.py", line 541, in call_plotters | ||
| + | File "chia/plotters/chiapos.py", line 58, in plot_chia | ||
| + | File "asyncio/runners.py", line 44, in run | ||
| + | File "asyncio/base_events.py", line 649, in run_until_complete | ||
| + | File "chia/plotting/create_plots.py", line 232, in create_plots | ||
| + | RuntimeError: std::exception | ||
| + | [1590] Failed to execute script 'chia' due to unhandled exception! | ||
| − | + | ... obviously, run in a screen session ... | |
| − | + | $ (screen) chia plotters chiapos --compress 0 --buffer 3408 --threads 4 --tmp_dir /mnt/ssd/chia/temp --final_dir /mnt/hdd/chia/plots --farmerkey 93c479a2de1e982f6b8cc15373e67ff851bf916ac10e91cb2cf1c512214a262697e9144a4a2202bd6e1c0a389779788d --contract xch1dp7qxxfhwq6s4ed2psn9mxk4rw0fpzk02elm82w3wqr2eg4rqfcqhtp725 --size 32 --count 1 | |
| − | + | Getting there! I now have 4 plots and it's come down from '''Never''' to '''180 years''' to '''90 years''' to '''48 years''' so the more plots you make the greater your chance of getting paid more :-) ... | |
| − | + | Farming status: Farming | |
| − | + | Total chia farmed: 0.0 | |
| + | User transaction fees: 0.0 | ||
| + | Block rewards: 0.0 | ||
| + | Last height farmed: 0 | ||
| + | Local Harvester | ||
| + | 4 plots of size: 405.464 GiB on-disk, 405.600 GiBe (effective) | ||
| + | Plot count for all harvesters: 4 | ||
| + | Total size of plots: 405.464 GiB, 405.600 GiBe (effective) | ||
| + | Estimated network space: 31.022 EiB | ||
| + | Expected time to win: 48 years and 2 months | ||
| − | + | '''Stopping Chia Properly''' | |
| − | + | Yeah, don't just shutdown the computer. You need to stop chia nicely then shutdown the computer. | |
| − | + | There's probably a systemd for that, but in the meantime type 'chia stop farmer' ... | |
| − | + | $ chia stop farmer | |
| − | + | chia_harvester: Stopped | |
| − | + | chia_farmer: Stopped | |
| − | + | chia_full_node: Stopped | |
| − | + | chia_wallet: Stopped | |
| − | + | '''Multiple Harvesters''' | |
| − | + | https://docs.chia.net/farming-on-many-machines/ | |
| − | + | Prepare your second machine and do all the ssl ca copying stuff (paul will add history to this section later!) | |
| − | |||
| − | + | Start '''just the harvester''' on the machine and then check on the Farmer that it has connected ... | |
| − | + | $ chia start harvester | |
| + | chia_harvester: started | ||
| + | |||
| + | $ netstat -ntap |grep 'IP ADDRESS' | ||
| + | tcp 0 0 192.168.0.158:8447 192.168.0.165:41998 ESTABLISHED 32300/chia_farmer | ||
| + | |||
| + | $ chia farm summary | ||
| + | Remote Harvester for IP: 192.168.0.165 | ||
| + | 0 plots of size: 0.000 MiB on-disk, 0.000 MiBe (effective) | ||
| − | + | When it has finished creating a plot, you will see a second Harvester on the Foxy Pool admin screen, and your Farmer will show the remote having 1 plot ... | |
| − | + | $ chia farm summary | |
| + | Farming status: Farming | ||
| + | Total chia farmed: 0.0 | ||
| + | User transaction fees: 0.0 | ||
| + | Block rewards: 0.0 | ||
| + | Last height farmed: 0 | ||
| + | Local Harvester | ||
| + | 19 plots of size: 1.881 TiB on-disk, 1.881 TiBe (effective) | ||
| + | Remote Harvester for IP: 192.168.0.165 | ||
| + | '''1 plots of size: 101.374 GiB on-disk, 101.400 GiBe (effective)''' | ||
| + | Plot count for all harvesters: 20 | ||
| + | Total size of plots: 1.980 TiB, 1.980 TiBe (effective) | ||
| + | Estimated network space: 31.377 EiB | ||
| − | + | '''Notifications''' | |
| − | + | It can take days to finish plotting on a Raspberry Pi or a NanoPC so use your Pushover account to be notified when the plotting has completed :) | |
| − | + | /usr/bin/curl -s --form-string "token=xxxxxxxxxxxxxxxx" --form-string "user=xxxxxxxxxxxxxxxx" --form-string "title=Chia Farmer" --form-string "message=has finished plotting." --form-string "priority=1" <nowiki>https://api.pushover.net/1/messages.json</nowiki> &>/dev/null | |
| − | + | '''Blogs Information''' | |
| − | + | This is nice with instructions and commands for setting up the SSDs and running the cli for plotting ... | |
| − | + | https://chiadecentral.com/best-nvme-for-chia-plotting-budget/ | |
| − | + | '''Budget Plotting Rig''' | |
| − | + | https://chiadecentral.com/budget-plotting-build/ | |
| − | + | '''Plots Calculator''' | |
| − | |||
| − | + | https://plot-plan.chia.foxypool.io/ | |
| − | + | '''Warning''' | |
| − | |||
| − | + | Hard drives have moving parts and wear out, so I am thinking I need a regular replication process to copy a complete hard drive to a newer one just in case :) | |
| − | + | ===== Monitoring ===== | |
| − | + | [https://github.com/martomi/chiadog ChiaDog - Docker container] | |
| − | https:// | + | [https://github.com/Chia-Network/chia-blockchain/wiki/Connecting-the-UI-to-a-remote-daemon Connecting the UI to a Remote Daemon] |
| − | https:// | + | [https://dashboard.chia.foxypool.io/login Chia Foxy Pool - My Dashboard] |
| − | + | ===== Backups ===== | |
| − | https:// | + | [https://wiki.spacefarmers.io/guides/farming/backupdb Backup the Chia Full Node Database] |
| − | + | ===== Auto Start ===== | |
| − | + | [https://wiki.spacefarmers.io/guides/farming/chia_autostart_linux Chia Autostart (Linux)] | |
| − | + | === Mobile Phone Mining === | |
| − | + | Mobile mining is one of the most exciting recent tech innovations for creating digital currency tokens. Mobile mining is the creation (i.e. mining) of cryptocurrencies using just a smartphone whereas traditionally it requires elaborate setups of Graphics Processing Units (GPUs) and Application-Specific Integrated Circuits (ASICs) that consume a lot of power. Mobile crypto mining is enabled through applications like MinerGate, Mobile Miner, and Bitcoin Miner. | |
| − | + | https://medium.com/crypto-blog/how-to-easily-start-mining-veruscoin-vrsc-with-an-android-based-smartphone-6640902608ff | |
| − | + | https://medium.com/crypto-blog/setting-up-and-using-orange-pi-5-for-mining-veruscoin-vrsc-6ae8932d443e | |
| − | + | https://github.com/VerusCoin/Verus-Desktop | |
| − | + | === Solo Lottery Mining === | |
| − | |||
| − | |||
| − | |||
| − | |||
| − | + | This is the least amount of effort for the slimest chance of a high reward (about 180 Billion to one). | |
| − | + | https://web.public-pool.io | |
| − | + | https://solo.ckpool.org | |
| − | + | https://solochance.com | |
| − | + | === LOLMiner === | |
| − | + | AMD & Nvidia & Intel Miner for Etchash, Autolykos2, Beam, Grin, Ae, ALPH, Flux, Equihash, Kaspa, Nexa, Ironfish and more. | |
| − | + | Best Dual Miner for KASPA and ALPH with full Unlock LHR in all ALGOs. | |
| − | + | https://lolminer.net | |
| − | + | https://github.com/Lolliedieb/lolMiner-releases | |
| − | |||
| − | |||
| − | |||
| − | + | === XMRig === | |
| − | + | XMRig is a high performance, open source, cross platform RandomX, KawPow, CryptoNight and GhostRider unified CPU/GPU miner and RandomX benchmark. Official binaries are available for Windows, Linux, macOS and FreeBSD. | |
| − | |||
| − | + | ==== Installation and Usage ==== | |
| − | + | '''System Tweaks''' | |
| − | + | First, if you have 4GB or more RAM for your rig, then enable [https://xmrig.com/docs/miner/hugepages Huge Pages] support in Linux, which will improve your mining performance ... | |
| − | + | sudo bash -c "echo vm.nr_hugepages=1280 >> /etc/sysctl.conf" | |
| + | sudo sysctl -w vm.nr_hugepages=1280 | ||
| − | + | '''Reduce CPU Usage''' | |
| − | + | In your config, look for something like: | |
| − | + | "rx/0": [-1, -1, -1], | |
| − | + | The number of -1's will be the number of threads the miner will use (in the above case, it's configured to use 3 threads). Just start removing -1's until you get the overall CPU usage you're looking for. | |
| − | + | '''Compile Software''' | |
| − | . | + | [https://xmrig.com/docs/miner/build/ubuntu Installation on Linux] |
| − | + | [https://xmrig.com/docs/miner/build/macos Installation on macOS] | |
| − | + | [https://dev.to/ijason/cpu-mining-on-a-raspberry-pi-1e1d Installation on Raspberry Pi] | |
| − | + | '''Generate Configuration''' | |
| − | ... | + | Generate your config file using the [https://xmrig.com/wizard XMRig Wizard], which will look something like this ... |
| − | + | { | |
| − | + | "autosave": true, | |
| − | + | "cpu": true, | |
| − | + | "opencl": false, | |
| − | + | "cuda": false, | |
| − | + | "pools": [ | |
| − | ... | + | { |
| + | "coin": "monero", | ||
| + | "algo": "rx/0", | ||
| + | "url": "stratum+tcp://randomxmonero.auto.nicehash.com:9200", | ||
| + | "user": "NHbLd5exQeCGGyWnopVoLHLbzexKN5z8iq7p.raspberrypizero2", | ||
| + | "pass": "x", | ||
| + | "tls": false, | ||
| + | "keepalive": true, | ||
| + | "nicehash": true | ||
| + | } | ||
| + | ] | ||
| + | } | ||
| − | + | '''Start XMRig''' | |
| − | Then | + | Then, save it to a file and use that on the command line ... |
| − | + | ./xmrig -c /Users/paullittlefield/xmrig_config.json | |
| − | |||
| − | .. | + | If successful you will see the following ... |
| − | + | * ABOUT XMRig/6.20.0 clang/13.0.0 | |
| − | + | * LIBS libuv/1.46.0 OpenSSL/3.1.2 hwloc/2.9.2 | |
| + | * HUGE PAGES supported | ||
| + | * 1GB PAGES unavailable | ||
| + | * CPU Intel(R) Core(TM) i5-4308U CPU @ 2.80GHz (1) 64-bit AES | ||
| + | L2:0.5 MB L3:3.0 MB 2C/4T NUMA:1 | ||
| + | * MEMORY 6.2/8.0 GB (77%) | ||
| + | DIMM0: 4 GB DDR3 @ 1600 MHz 0x484D54343531533641465238412D50422020 | ||
| + | DIMM0: 4 GB DDR3 @ 1600 MHz 0x484D54343531533641465238412D50422020 | ||
| + | * MOTHERBOARD Apple Inc. - Mac-189A3D4F975D5FFC | ||
| + | * DONATE 1% | ||
| + | * ASSEMBLY auto:intel | ||
| + | * POOL #1 stratum+tcp://randomxmonero.auto.nicehash.com:9200 coin Monero | ||
| + | * COMMANDS hashrate, pause, resume, results, connection | ||
| + | * OPENCL disabled | ||
| + | * CUDA disabled | ||
| + | [2023-08-10 21:47:09.349] net use pool randomxmonero.auto.nicehash.com:9200 34.149.22.228 | ||
| + | [2023-08-10 21:47:09.350] net new job from randomxmonero.auto.nicehash.com:9200 diff 238106 algo rx/0 height 52433 | ||
| + | [2023-08-10 21:47:09.350] cpu use argon2 implementation AVX2 | ||
| + | [2023-08-10 21:47:09.350] randomx init dataset algo rx/0 (4 threads) seed c5596b1df4d0b3f5... | ||
| + | [2023-08-10 21:47:09.942] randomx allocated 2336 MB (2080+256) huge pages 0% 0/1168 +JIT (592 ms) | ||
| + | [2023-08-10 21:47:20.091] randomx dataset ready (10148 ms) | ||
| + | [2023-08-10 21:47:20.091] cpu use profile rx (2 threads) scratchpad 2048 KB | ||
| + | [2023-08-10 21:47:21.257] cpu READY threads 2/2 (2) huge pages 0% 0/2 memory 4096 KB (1167 ms) | ||
| + | [2023-08-10 21:47:39.118] net new job from randomxmonero.auto.nicehash.com:9200 diff 238106 algo rx/0 height 52433 | ||
| − | + | ===== NVIDIA CUDA ===== | |
| − | + | [https://developer.nvidia.com/cuda-downloads?target_os=Linux&target_arch=x86_64&Distribution=Ubuntu&target_version=20.04&target_type=runfile_local Nvidia CUDA for Ubuntu 20.04] | |
| + | |||
| + | The CUDA plugin build is optional and only required if you like to use NVIDIA GPUs. | ||
| + | Follow instructions on https://developer.nvidia.com/cuda-downloads to install CUDA then do the following ... | ||
| − | ... | + | git clone <nowiki>https://github.com/xmrig/xmrig-cuda.git</nowiki> |
| + | mkdir xmrig-cuda/build && cd xmrig-cuda/build | ||
| + | cmake .. -DCUDA_LIB=/usr/local/cuda/lib64/stubs/libcuda.so -DCUDA_TOOLKIT_ROOT_DIR=/usr/local/cuda | ||
| + | make -j$(nproc) | ||
| − | + | Then, continue with the main XMRig installation. | |
| − | + | https://xmrig.com/docs/miner/build/ubuntu | |
| − | + | === NiceHash === | |
| − | + | NiceHash is the world's leading hashpower marketplace, where you connect your computers as miners and earn Bitcoin for every share. | |
| − | + | ==== Links ==== | |
| − | + | [https://www.nicehash.com NiceHash] | |
| − | + | [https://www.nicehash.com/cpu-gpu-mining CPU and GPU Mining with NiceHash QuickMiner] | |
| − | + | [https://www.nicehash.com/support/mining-help/nicehash-os/what-is-nicehash-os What is NiceHash OS] | |
| − | + | [https://www.nicehash.com/guide/nicehash-os-user-guide NiceHash OS User Guide] | |
| − | |||
| − | |||
| − | |||
| − | |||
| − | |||
| − | |||
| − | [https://www. | + | [https://www.nicehash.com/guide/nicehash-optimize-guide NiceHash Rig Manager User Guide] |
| − | + | [https://discord.com/invite/nicehash NiceHash Discord Group] | |
| − | [https:// | + | [https://github.com/nicehash NiceHash on GitHub] |
| − | + | [https://www.nicehash.com/blog/post/how-to-connect-hiveos-rig-to-nicehash Connect HiveOS rig to NiceHash] | |
| − | + | [https://xmrig.com/docs/miner/command-line-options XMRig Command Line Options] | |
| − | + | ==== Mining Hardware ==== | |
| − | [https://www.worthpoint.com/worthopedia/usb-asic-scrypt-144khs-dragon-1880308293 USB ASIC SCRYPT 144KHS DRAGON LITECOIN MINERS] | + | {| class="wikitable sortable" |
| − | + | |- | |
| − | ==== Raspberry Pi ==== | + | ! Type !! Name !! Speed !! NiceHash Profitability |
| + | |- | ||
| + | | CPU || Intel(R) Core(TM) i3 CPU M 380 @ 2.53GHz || 0.20 kH/s || 0.00000035 | ||
| + | |- | ||
| + | | CPU || Intel(R) Core(TM) i5-4250U CPU @ 1.30GHz || 0.25 kH/s || 0.00000111 | ||
| + | |- | ||
| + | | CPU || Intel(R) Core(TM) i5-6200U CPU @ 2.30GHz || 0.75 kH/s || 0.00000125 | ||
| + | |- | ||
| + | | CPU || AMD FX(tm)-4350 Quad-Core Processor @ 4.20GHz || 0.95 kH/s || 0.00000104 | ||
| + | |- | ||
| + | | GPU || Nvidia GeForce GTX 960 || 7.15 kH/s || ???? | ||
| + | |- | ||
| + | | ASIC || LKETC Dragon || 130.00 kH/s || on public-pool.airdns.org low difficulty | ||
| + | |- | ||
| + | | ASIC || GekkoScience 2PAC || 9.80 GH/s || on Braiins Pool | ||
| + | |- | ||
| + | | ASIC || GekkoScience COMPAC-F || 120.80 GH/s || on Braiins Pool | ||
| + | |- | ||
| + | | Example || Example || Example || Example | ||
| + | |} | ||
| + | |||
| + | ==== Disable X on NiceHash OS ==== | ||
| + | |||
| + | * Set your SSH password and/or SSH Key in the <code>configuration.json</code> file on the root of the USB drive. | ||
| + | * Use the USB drive in your computer and boot as normal. | ||
| + | * Watch the NHM4 Information screen for registration and check your [https://www.nicehash.com/my/mining/rigs web Dashboard] for the rig to appear correctly. | ||
| + | * Log in to your rig over SSH and type 'sudo -i' to become root. | ||
| + | * First, disable X with the command <code>systemctl disable lightdm.service</code> | ||
| + | * Second, make the boot console only with the command <code>nano /etc/default/grub</code> and change the lines so that it they read <code>GRUB_CMDLINE_LINUX_DEFAULT="text nomodeset quiet consoleblank=60"</code> and <code>GRUB_TERMINAL=console</code> | ||
| + | * Type the command <code>update-grub</code> to save your changes. | ||
| + | * Then, type <code>reboot</code> and watch the magic happen :) | ||
| + | |||
| + | ==== Help ==== | ||
| + | |||
| + | [https://www.nicehash.com/blog/post/how-to-make-a-coinbase-withdrawal-from-nicehash-2022#! How to make a Coinbase withdrawal from NiceHash] | ||
| + | |||
| + | === Hiveon === | ||
| + | |||
| + | [https://hiveon.com Hiveon] is the ultimate mining platform which allows users to setup, mine and control processes more effectively and hassle-free across thousands of rigs all from a single place. Everything you and your team need to keep your farm at peak efficiency. | ||
| + | |||
| + | * '''Farm''' = a group of rigs which mine. | ||
| + | * '''Rig''' = a mining device equipped with a motherboard, CPU, RAM, SSD/HDD, and GPU. | ||
| + | * '''Worker''' = a piece of hardware which will mine. | ||
| + | |||
| + | ==== Setup ==== | ||
| + | |||
| + | [https://hiveon.com/install/ Download the zip installer to burn on to an SSD] | ||
| + | |||
| + | I really needed these simple, step by step instructions because it is not clear and some of the links are dead (sigh). | ||
| + | |||
| + | STAGE 1 | ||
| + | |||
| + | # create an account at [https://hiveon.com Hiveon] | ||
| + | # confirm the link in the email | ||
| + | # log in | ||
| + | # your first farm will be automatically created | ||
| + | # click ''add rig'' | ||
| + | # follow the wizard to [https://download2.hiveos.farm/history/hiveos-0.6-222-stable@230512.img.xz download the Hiveon OS] and burn it to your USB drive | ||
| + | # in the wizard, download the ''rig.conf'' file | ||
| + | # when the USB drive has finished being created, take it out, then back in and mount HIVE partition | ||
| + | # copy that ''rig.conf'' file to the HIVE partition and then unmount the drive partition | ||
| + | # pull out the drive and put it in your mining rig computer | ||
| + | # start the computer and watch your [https://the.hiveos.farm/ Hiveon Dashboard] for the rig to appear in your farm | ||
| + | |||
| + | STAGE 2 | ||
| + | |||
| + | [https://hiveon.com/knowledge-base/guides/how_to_start_mine_in_hiveon_os/ How to create a wallet and a flight sheet, and to start mine in Hiveon OS] | ||
| + | |||
| + | |||
| + | '''My God, this was hard work...''' | ||
| + | |||
| + | https://hiveon.com/forum/t/nicehash-read-error-end-of-file/81387/8 | ||
| + | |||
| + | ==== Help ==== | ||
| + | |||
| + | ===== Remove Missing Worker Graphics Card ===== | ||
| + | |||
| + | Farm > Rig > Settings > Cards/Boards Quantity | ||
| + | |||
| + | Number of cards/boards in the worker increases automatically. If you need to decrease it, please update this parameter. | ||
| + | |||
| + | ===== Change the repo used in the HiveOS ubuntu distribution ===== | ||
| + | |||
| + | Dashboard > Farm > Rig > Settings > Repo Select: '''<nowiki>http://download2.hiveos.farm/repo/binary</nowiki>''' | ||
| + | |||
| + | When you try to upgrade and it fails with the following error:- | ||
| + | |||
| + | selfupgrade && sreboot (failed, exitcode=100) | ||
| + | |||
| + | Open a web shell and type the following ... | ||
| + | |||
| + | sudo -i | ||
| + | rm /var/lib/apt/lists/* -vf | ||
| + | |||
| + | Edit the file /etc/apt/sources.list.d/hiverepo.list and delete all of it then add this line ... | ||
| + | |||
| + | deb [trusted=yes] <nowiki>http://download2.hiveos.farm/repo/binary</nowiki> / | ||
| + | |||
| + | Then, continue with these commands ... | ||
| + | |||
| + | apt-get clean | ||
| + | apt-get update | ||
| + | apt-get check | ||
| + | selfupgrade | ||
| + | sreboot | ||
| + | |||
| + | ===== Update the Kernel ===== | ||
| + | |||
| + | hive shell start | ||
| + | |||
| + | hive-replace -y -s | ||
| + | reboot | ||
| + | |||
| + | ==== Links ==== | ||
| + | |||
| + | [https://www.nicehash.com/blog/post/how-to-connect-hiveos-rig-to-nicehash Connect HiveOS rig to NiceHash] | ||
| + | |||
| + | [https://hiveon.com/os/ Hiveon OS] | ||
| + | |||
| + | [https://hiveon.net/ The most profitable Ethereum Classic mining pool for GPU rigs] | ||
| + | |||
| + | [https://download2.hiveos.farm/ Downloads] | ||
| + | |||
| + | [https://hiveon.com/forum Hiveon Forum] | ||
| + | |||
| + | [https://hiveon.com/changelog/?type=All&page=1 Hiveon OS Changelog] | ||
| + | |||
| + | [https://hiveon.com/forum/t/hive-api-v2/4490 API] | ||
| + | |||
| + | [https://myminingrig.com/how-to-install-hiveos-to-sata-or-msata-drive/ How to Install Hive OS to a M.2 SATA or mSATA drive] | ||
| + | |||
| + | === Bobcat Miner 300 === | ||
| + | |||
| + | The [https://shop.bobber.com/products/bobcat-miner-300 Bobcat Miner 300] is a wireless hotspot miner that allows users to mine Helium (HNT) cryptocurrency by providing wireless coverage and processing wireless transactions. | ||
| + | |||
| + | ==== Setup ==== | ||
| + | |||
| + | Current firmware version: 1.0.3.17 | ||
| + | My firmware version: 1.0.2.1Z_11217 | ||
| + | |||
| + | Plug in your Ethernet cable first, then turn it on. Find out the IP address by using a network scanner then connect to it with your web browser. This will load the 'Diagnoser Diagnostic Dashboard' Then, click Reset to reset it, which will force it to firmware update over the Internet (and not it's antenna). When prompted, type "I Agree" and then YES, and then type in the username and password:- | ||
| + | |||
| + | username: bobcat | ||
| + | password: miner | ||
| + | |||
| + | Wait. Wait some more. During The LED light will turn white, yellow, red, yellow and then green. ''This can take days''. Wait for the light to go GREEN. | ||
| + | |||
| + | Continue with the [https://zendesk.bobber.com/hc/en-us/articles/4409908795803-Quick-Start-Guide Quick Start Guide]. | ||
| + | |||
| + | ==== Help ==== | ||
| + | |||
| + | https://zendesk.bobber.com/hc/en-us/articles/4412905659675-How-to-Get-OTA-Updates- | ||
| + | |||
| + | https://cryptoguzzler.com/bobcat-miners-everything-to-know/ | ||
| + | |||
| + | https://www.reddit.com/r/HeliumNetwork/comments/12v5mbg/bobcat_miner_stuck_at_error_wait/ | ||
| + | |||
| + | https://www.reddit.com/r/HeliumNetwork/comments/15b8h7d/setting_up_bobcat300_uk/ | ||
| + | |||
| + | https://device.report/bobcat/MINER3001 | ||
| + | |||
| + | ==== Fix OLD Firmware Bug With NEW Nebra Firmware ==== | ||
| + | |||
| + | [https://discord.com/channels/860251893803384893/860251893803384896/1140683245776801944 Discord Thread] | ||
| + | |||
| + | [https://hub.nebra.com/ NEBRA Firmware and Instructions] | ||
| + | |||
| + | '''DISCORD INSTRUCTIONS''' | ||
| + | |||
| + | This method is tested and verified now on Linux and Mac ... (Image only currently works on g290 and g295)... | ||
| + | |||
| + | We also support g280 (which is the 1gb bobcat, this uses a different image though and can run using SD card. See https://support.nebra.com/support/solutions/articles/24000085839-getting-started-with-bobcat-1g | ||
| + | |||
| + | sudo apt update | ||
| + | sudo apt install snapd | ||
| + | sudo reboot | ||
| + | sudo snap install core | ||
| + | sudo snap install rkdeveloptool --edge | ||
| + | |||
| + | Follow these instructions to install the Rockchip flashing tools depending on the OS you run on your PC: https://wiki.radxa.com/Rock3/install/rockchip-flash-tools. | ||
| + | |||
| + | If you try to compile on Linux and you receive this error ... | ||
| + | |||
| + | configure: error: C++ preprocessor fails sanity check | ||
| + | |||
| + | Then you look in side the error.log file and find this ... | ||
| + | |||
| + | cpp: fatal error: cannot execute 'cc1plus': execvp: No such file or directory | ||
| + | |||
| + | Then you install these extra programs ... | ||
| + | |||
| + | sudo apt-get install gcc g++ | ||
| + | |||
| + | Then you can continue to compile ... | ||
| + | |||
| + | aclocal | ||
| + | autoreconf -f -i | ||
| + | CXXCPP=/usr/bin/cpp ./configure | ||
| + | make | ||
| + | |||
| + | Copy the software to your main system location, ready for running ... | ||
| + | |||
| + | sudo cp -av rkdeveloptool /usr/local/bin/ | ||
| + | sudo ldconfig | ||
| + | |||
| + | Test to make sure it works ... | ||
| + | |||
| + | rkdeveloptool -v | ||
| + | |||
| + | Download and extract/unzip the Helium Nebra OS image for the Bobcat RK3566. https://github.com/NebraLtd/helium-bobcat-rk3566/releases | ||
| + | |||
| + | Open the case of the Bobcat unit so you can access the two small buttons on the board labeled "reset" and "recovery" or similar. You will need a T9 Torx Screwdriver - https://www.ebay.co.uk/itm/193865952874 or just the end bit https://www.ebay.co.uk/itm/334425081302 | ||
| + | |||
| + | Use a micro USB cable to connect the Bobcat to your PC (below instructions for Mac and Linux). The Bobcat has two micro USB connectors; use the one that's accessible from the back panel (labeled "USB_OTG" on the PCB). | ||
| + | |||
| + | Power the Bobcat via its regular power adapter while connected to the PC via micro USB. | ||
| + | |||
| + | Press and hold the "recovery" button; quickly press and release the "reset" button; release the "recovery" button after about 1 second. This will put your device into the so-called "loader" mode. | ||
| + | |||
| + | Then run ... | ||
| + | |||
| + | sudo rkdeveloptool ld | ||
| + | |||
| + | ... which should print a device in "loader" mode. | ||
| + | |||
| + | '''DevNo=1 Vid=0x2207,Pid=0x350a,LocationID=102 Loader''' | ||
| + | |||
| + | Then run ... | ||
| + | |||
| + | sudo rkdeveloptool ef | ||
| + | |||
| + | ... which should take about one minute to erase the flash. | ||
| + | |||
| + | '''Erasing flash complete.''' | ||
| + | |||
| + | Then you need to reset the board by pressing the reset button, and afterwards run ... | ||
| + | |||
| + | sudo rkdeveloptool ld | ||
| + | |||
| + | ... which should print a device in "maskrom" mode. | ||
| + | |||
| + | '''DevNo=1 Vid=0x2207,Pid=0x350a,LocationID=102 Maskrom''' | ||
| + | |||
| + | Then download and install the new ROM with ... | ||
| + | |||
| + | wget <nowiki>https://dl.radxa.com/rock3/images/loader/rock-3a/rk356x_spl_loader_ddr1056_v1.10.111.bin</nowiki> | ||
| + | sudo rkdeveloptool db rk356x_spl_loader_ddr1056_v1.10.111.bin | ||
| + | |||
| + | ... which downloads and installs the bootloader used for various rkdeveloptool commands. | ||
| + | |||
| + | ‘rk356x_spl_loader_ddr1056_v1.10.111.bin’ saved [453056/453056] | ||
| + | '''Downloading bootloader succeeded.''' | ||
| + | |||
| + | Then run ... | ||
| + | |||
| + | sudo rkdeveloptool td | ||
| + | |||
| + | ... which should succeed communicating with the device. | ||
| + | |||
| + | '''Test Device OK.''' | ||
| + | |||
| + | Then run ... | ||
| + | |||
| + | sudo rkdeveloptool wl 0 /path/to/extracted_nebra_image.img | ||
| + | |||
| + | ... replacing with the actual image path. This will write the OS image onto the eMMC at address 0. | ||
| + | |||
| + | '''Write LBA from file (100%)''' | ||
| + | |||
| + | Then you just need to reset (press reset button) the board and enjoy Nebra firmware. | ||
| + | |||
| + | You will need to use Ethernet initially. And you can set up the WiFi again using the Nebra app over Bluetooth. | ||
| + | |||
| + | You can verify its working by checking the following ... | ||
| + | |||
| + | * device will appear in your network with hostname of nebra-xxxxxx where the Xs are the last 6 digits of the MAC address (this will be a different MAC address to what is printed on the device label) | ||
| + | * after the unit has fully booted you will see a green light flashing | ||
| + | * after the unit has fully booted you should see a Bluetooth device advertised for 5 minutes after it boots up (either via the Nebra hotspot app or another Bluetooth scanner app) | ||
| + | * after the unit has fully booted up you should be able to access the Nebra diagnostics page on the local IP address of the miner or the hostname mentioned above using http://nebra-xxxxxx/ or http://nebra-xxxxxx.local/ where the Xs are the last 6 digits of the MAC address (this will be a different MAC address to what is printed on the device label) | ||
| + | * after the unit has fully booted you should be able to see an SSH client on port 22222 (you won't be able to log in but you should be able to see/ping it) | ||
| + | |||
| + | Good luck. | ||
| + | |||
| + | [https://www.nowitness.org/troubleshooting/ REALLY GOOD INFORMATION AND TROUBLESHOOTING PAGE] | ||
| + | |||
| + | === Docker === | ||
| + | |||
| + | [https://wiki.indie-it.com/wiki/Docker#Crypto_Mining Crypto Mining using Docker] | ||
| + | |||
| + | === Hardware Miners === | ||
| + | |||
| + | altcoin usb miners. Work great for beginners and novice alike. Windows drivers installed on hardware so it's basically plug and play. Cgminer and bfgminer work great with linux. A USB hub and a few of these miners and you will have your own little mining farm. Raspberry pi makes good controller board. | ||
| + | |||
| + | [https://freeshelfs.com/top-10-usb-asic-miner-usb-flash-drives/ Top 10 USB ASIC Miner - USB Flash Drives] | ||
| + | |||
| + | [https://www.worthpoint.com/worthopedia/usb-asic-scrypt-144khs-dragon-1880308293 USB ASIC SCRYPT 144KHS DRAGON LITECOIN MINERS] | ||
| + | |||
| + | ==== BitAxe ==== | ||
| + | |||
| + | The BitAxe is a fully open source hardware Bitcoin ASIC miner. | ||
| + | |||
| + | [https://github.com/skot/bitaxe GitHub] | ||
| + | |||
| + | [https://opensourceminer.com/products/bitaxe-201 BitAxe 201] - It says U.S. only but use a reshipping service like [https://www.stackry.com Stackry] or [https://www.myus.com MyUS] to get it to the U.K. ;-) | ||
| + | |||
| + | ===== Troubleshooting ===== | ||
| + | |||
| + | Make sure you only put the domain name part in to the Axe OS Settings page e.g. '''eu.stratum.braiins.com''' and ''not'' stratum+tcp://eu.stratum.braiins.com:3333 | ||
| + | |||
| + | If the Wireless will not connect, you can take the miner out of range of your wifi and use the USB port to provide enough power just to do the settings. ''The miner will try 5 times to connect and then will reset itself'' and you can connect to its own wifi hotspot to redo the settings again. '''The RESET button on the board does not work at this time.''' | ||
| + | |||
| + | ==== Goldshell ==== | ||
| + | |||
| + | Goldshell make small, quiet, low power ASIC miners. | ||
| + | |||
| + | [https://www.goldshell.com/products/ Products] | ||
| + | |||
| + | [https://goldshellhelp.zendesk.com/hc/en-us/articles/17608508984729-BOX-Series-Tutorial KD Box Tutorial] | ||
| + | |||
| + | [https://github.com/goldshellminer/firmware Firmware] | ||
| + | |||
| + | ==== Raspberry Pi ==== | ||
| + | |||
| + | This will not mine, but is only used as a controller for the ASIC USB. | ||
| + | |||
| + | This is an example /etc/rc.local file which starts the miner, keeps a ping on the server alive and sends a Pushover notification when it has booted ... | ||
| + | |||
| + | #!/bin/sh -e | ||
| + | # | ||
| + | # rc.local | ||
| + | # | ||
| + | # This script is executed at the end of each multiuser runlevel. | ||
| + | # Make sure that the script will "exit 0" on success or any other | ||
| + | # value on error. | ||
| + | # | ||
| + | # In order to enable or disable this script just change the execution | ||
| + | # bits. | ||
| + | # | ||
| + | # By default this script does nothing. | ||
| + | |||
| + | # Print the IP address | ||
| + | _IP=$(hostname -I) || true | ||
| + | if [ "$_IP" ]; then | ||
| + | printf "My IP address is %s\n" "$_IP" | ||
| + | fi | ||
| + | |||
| + | sleep 10s | ||
| + | |||
| + | /etc/init.d/procps force-reload | ||
| + | |||
| + | # disable HDMI | ||
| + | /usr/bin/tvservice -o | ||
| + | |||
| + | screen -S MINER -d -m /root/cgminer-kanoi/cgminer --gekko-2pac-detect --url stratum+tcp://eu.stratum.braiins.com:3333 --user mybraiinsusername.raspberrypi-asic-2pac --pass my password | ||
| + | |||
| + | sleep 10s | ||
| + | |||
| + | screen -S PING -d -m /usr/bin/ping -i 10 eu.stratum.braiins.com | ||
| + | |||
| + | /usr/bin/curl -s --form-string "token=xxxxxxxxxxxxxxxx" --form-string "user=xxxxxxxxxxxxxxx" --form-string "title=`hostname -f`" --form-string "message=has booted with IP address `hostname -I`" <nowiki>https://api.pushover.net/1/messages.json</nowiki> &>/dev/null | ||
| + | |||
| + | exit 0 | ||
| + | |||
| + | ==== GekkoScience ==== | ||
| + | |||
| + | https://github.com/kanoi/cgminer | ||
| − | + | https://kano.is/gekko.php | |
| + | |||
| + | '''https://pool.braiins.com/''' - worked first time! | ||
| + | |||
| + | ===== Instructions ===== | ||
| − | + | Build the software ... | |
| − | + | sudo -i | |
| − | + | apt update | |
| − | + | apt install build-essential autoconf automake libtool pkg-config libcurl4-openssl-dev libudev-dev libusb-1.0-0-dev libncurses5-dev zlib1g-dev git screen -y | |
| − | + | mkdir cgminer-kanoi | |
| − | + | git clone <nowiki>https://github.com/kanoi/cgminer.git</nowiki> cgminer-kanoi | |
| − | + | cd cgminer-kanoi | |
| − | + | ./autogen.sh | |
| − | + | CFLAGS="-O2 -Wall -march=native -fcommon" ./configure --enable-gekko | |
| − | + | make | |
| − | + | ./cgminer --version | |
| − | + | ||
| − | + | Check the hardware ... | |
| + | |||
| + | PLUG IN THE ASIC | ||
| + | |||
| + | dmesg | tail -n20 | ||
| + | [ 4957.097527] usb 2-1.4: new full-speed USB device number 6 using xhci_hcd | ||
| + | [ 4957.198835] usb 2-1.4: New USB device found, idVendor=0403, idProduct=6015, bcdDevice=10.00 | ||
| + | [ 4957.198843] usb 2-1.4: New USB device strings: Mfr=1, Product=2, SerialNumber=0 | ||
| + | [ 4957.198846] usb 2-1.4: Product: FT232EX | ||
| + | [ 4957.198848] usb 2-1.4: Manufacturer: FTDI | ||
| + | [ 4957.218436] usbcore: registered new interface driver usbserial_generic | ||
| + | [ 4957.218450] usbserial: USB Serial support registered for generic | ||
| + | [ 4957.228500] usbcore: registered new interface driver ftdi_sio | ||
| + | [ 4957.228516] usbserial: USB Serial support registered for FTDI USB Serial Device | ||
| + | [ 4957.228594] ftdi_sio 2-1.4:1.0: FTDI USB Serial Device converter detected | ||
| + | [ 4957.228634] usb 2-1.4: Detected FT-X | ||
| + | [ 4957.230178] usb 2-1.4: '''FTDI USB Serial Device converter now attached to ttyUSB0''' | ||
| − | # | + | root@356fbd891b0e:~/cgminer-kanoi# lsusb |
| − | + | Bus 001 Device 002: ID 8087:8000 Intel Corp. | |
| − | + | Bus 001 Device 001: ID 1d6b:0002 Linux Foundation 2.0 root hub | |
| − | + | Bus 003 Device 001: ID 1d6b:0003 Linux Foundation 3.0 root hub | |
| − | + | Bus 002 Device 002: ID 0781:5567 SanDisk Corp. Cruzer Blade | |
| − | + | Bus 002 Device 005: ID 0000:0606 | |
| − | + | Bus 002 Device 006: ID '''0403:6015 Future Technology Devices International, Ltd Bridge(I2C/SPI/UART/FIFO)''' | |
| − | + | Bus 002 Device 003: ID 0000:0606 USB Hub 2.0 USB Hub 2.0 | |
| − | / | + | Bus 002 Device 001: ID 1d6b:0002 Linux Foundation 2.0 root hub |
| − | + | ||
| − | + | Start the software ... | |
| − | + | ||
| − | + | '''COMPACF''' | |
| − | screen -S MINER -d -m /root/cgminer-kanoi/cgminer --gekko- | + | |
| − | + | screen -S MINER -d -m /root/cgminer-kanoi/cgminer --gekko-compacf-detect -o stratum+tcp://eu.stratum.braiins.com:3333 -u myusername.nuc-asic-compacf -p mysuperpassword123 | |
| − | + | ||
| − | + | ... and with tweaks ... | |
| − | |||
| − | |||
| − | |||
| − | |||
| − | |||
| − | + | screen -S MINER -d -m /root/cgminer-kanoi/cgminer --gekko-compacf-detect --gekko-compacf-freq 460 --gekko-mine2 --gekko-start-freq 250 --suggest-diff 442 -o stratum+tcp://eu.stratum.braiins.com:3333 -u myusername.nuc-asic-compacf -p mysuperpassword123 | |
| − | + | '''2PAC''' | |
| − | + | screen -S MINER -d -m /root/cgminer-kanoi/cgminer --gekko-2pac-detect -o stratum+tcp://eu.stratum.braiins.com:3333 -u myusername.raspberrypi-asic-2pac -p mysuperpassword123 | |
| − | ''' | + | ... and with tweaks ''(needs checking)'' ... |
| − | + | screen -S MINER -d -m /root/cgminer-kanoi/cgminer --gekko-2pac-detect --gekko-2pac-freq 460 --gekko-mine2 --gekko-start-freq 250 --suggest-diff 442 -o stratum+tcp://eu.stratum.braiins.com:3333 -u myusername.nuc-asic-compacf -p mysuperpassword123 | |
| − | + | If you see any of these errors, try taking the miner stick out of the USB socket and plug it back in again. | |
| − | + | No device found! | |
| − | + | GSD 0: Error, disabling now. | |
| − | + | ||
| − | + | ==== NerdMiner ==== | |
| − | + | ||
| − | + | A super small Bitcoin lottery miner that only uses 1 watt of power. | |
| − | + | ||
| − | + | The Nerd Miner V2 is the ultimate micro Bitcoin mining solution for those seeking a compact, efficient, and captivating Bitcoin mining experience. The Nerd Miner V2 tries to solo mine a Bitcoin block. This means you have a chance to win a full Bitcoin block reward of 6.25 Bitcoin + transaction fees while supporting the Bitcoin network with hash power! | |
| − | |||
| − | |||
| − | + | https://bitwater.ch/nerd-miner-v2/ | |
| − | + | https://docs.bitwater.ch/nerd-miner-v2/product-guide/setup | |
| − | + | ==== Mars Lander ==== | |
| − | |||
| − | |||
| − | |||
| − | |||
| − | |||
| − | |||
| − | |||
| − | |||
| − | |||
| − | |||
| − | |||
| − | |||
| − | |||
| − | |||
| − | |||
| − | |||
| − | |||
| − | |||
| − | |||
| − | |||
| − | |||
| − | |||
| − | + | '''To reset''' | |
| − | + | Put SD card in a computer and delete the file called "deleteforfactorydefaults", then put SD card back in miner. | |
| − | + | ==== LKETC ==== | |
| − | + | '''Introduction''' | |
| − | + | This is a cheap USB crypto miner that is no good for NiceHash or any other major mining pool. | |
| − | + | [https://raw.githubusercontent.com/wareck/cgminer-lketc/master/docs/lketc.jpg Image of USB Bitcoin Miner with black box and gold writing] | |
| − | |||
| − | |||
| − | |||
| − | |||
| − | |||
| − | |||
| − | |||
| − | |||
| − | |||
| − | |||
| − | |||
| − | |||
| − | |||
| − | |||
| − | |||
| − | |||
| − | |||
| − | |||
| − | |||
| − | |||
| − | |||
| − | |||
| − | |||
| − | |||
| − | |||
| − | |||
| − | |||
| − | |||
| − | [https://raw.githubusercontent.com/wareck/cgminer-lketc/master/docs/lketc.jpg Image of USB Bitcoin Miner with black box and gold writing] | ||
'''Installation''' | '''Installation''' | ||
| Line 1,345: | Line 1,848: | ||
[https://coindoo.com/how-to-invest-in-web3/ How to Invest in Web3? Best Ways to Make Money on Web3] | [https://coindoo.com/how-to-invest-in-web3/ How to Invest in Web3? Best Ways to Make Money on Web3] | ||
| + | |||
| + | === Raydium === | ||
| + | |||
| + | Raydium is a decentralized finance (DeFi) protocol built on the Solana blockchain. It brings together the power of blockchain technology and the convenience of decentralized applications (dApps) to provide users with a seamless and secure platform for financial activities. | ||
| + | |||
| + | [https://raydium.io Raydium] | ||
| + | |||
| + | [https://www.youtube.com/watch?v=xmj8UUlYCt0 How to use Raydium Swap | Solana DEX] | ||
| + | |||
| + | [https://dexscreener.com/solana/2ecxmqgtuvtx5ci2k4qt97c95erasm191jek9xcxuhth DexScreener - The Penguin Dilemma] | ||
== Help == | == Help == | ||
| Line 1,367: | Line 1,880: | ||
[https://kentbitcoin.com/ Kent Bitcoin] | [https://kentbitcoin.com/ Kent Bitcoin] | ||
| + | |||
| + | [https://www.indiegogo.com/projects/avalon-nano-3-blockchain-smart-home Avalon Nano 3 - BLOCKCHAIN SMART HOME - The portable heater mines bitcoin] | ||
==== My Miners ==== | ==== My Miners ==== | ||
| Line 1,372: | Line 1,887: | ||
{| class="wikitable" | {| class="wikitable" | ||
|- | |- | ||
| − | ! hostname !! ip address !! pool name !! | + | ! hostname !! ip address !! pool !! pool name !! device !! hashrate !! coin |
| + | |- | ||
| + | | raspberrypi-miner-1 || 192.168.0.193/24 || Braiins || raspberrypi-asic-2pac-2 || GekkoScience 2-PAC || 20 GH/s || Bitcoin (BTC) | ||
| + | |- | ||
| + | | mars-lander-1 || 192.168.0.124/24 || Braiins || mars-lander-1 || GekkoScience 2-PAC || 20 GH/s || Bitcoin (BTC) | ||
| + | |- | ||
| + | | smart-hub-1 || 192.168.0.128/24 || Braiins || smart-hub-1 || GekkoScience COMPAC-F x 3 || 1 TH/s || Bitcoin (BTC) | ||
| + | |- | ||
| + | | nerd-miner-1 || 192.168.0.200/24 || Public Pool || nerd-miner-1 || Nerd Miner v2 || 50 KH/s || Bitcoin (BTC) | ||
| + | |- | ||
| + | | nerd-miner-2 || 192.168.0.188/24 || Public Pool || nerd-miner-2 || Nerd Miner v2 || 50 KH/s || Bitcoin (BTC) | ||
| + | |- | ||
| + | | nerd-miner-3 || 192.168.0.112/24 || Public Pool || nerd-miner-3 || Nerd Miner Mini || 50 KH/s || Bitcoin (BTC) | ||
|- | |- | ||
| − | | | + | | nerd-miner-4 || 192.168.0.113/24 || Public Pool || nerd-miner-4 || Nerd Miner Mini || 50 KH/s || Bitcoin (BTC) |
|- | |- | ||
| − | | | + | | gpu-rig-1 || 192.168.0.152/24 || 2Miners || paullyrainbowminer || NVIDIA 1080 GTX 8GB x 8 || 600 S/s || Bitcoin Gold (BTG) |
|- | |- | ||
| − | | | + | | kd-box-1 || 192.168.0.170/24 || F2Pool || kdbox1 || Goldshell KD Box || 1.6 TH/s || Kadena (KDA) |
|- | |- | ||
| − | | | + | | kd-box-2 || 192.168.0.192/24 || F2Pool || kdbox2 || Goldshell KD Box Pro || 2.6 TH/s || Kadena (KDA) |
|- | |- | ||
| − | | | + | | kd-box-3 || 192.168.0.???/24 || F2Pool || kdbox3 || Goldshell KD Box Pro || 2.6 TH/s || Kadena (KDA) |
|- | |- | ||
| − | | | + | | nanopc-t4-1 || 192.168.0.156/24 || Foxy-Pool || ffe475f778 || NanoPC T4 || Plots of 103 GB || Chia (XCH) |
|- | |- | ||
| − | | | + | | nanopc-t4-2 || 192.168.0.158/24 || Foxy-Pool || 0f6ada7b5e || NanoPC T4 || Plots of 103 GB || Chia (XCH) |
|} | |} | ||
| Line 1,392: | Line 1,919: | ||
BTC - 3HE4HcwsYjdTrGEs6foT6mUd66KDGNjqCU | BTC - 3HE4HcwsYjdTrGEs6foT6mUd66KDGNjqCU | ||
| − | + | BTG - GVpt8UDKMKQyBMNicXshS5H7yefSwXPHJ3 | |
| − | + | USDT - 0xde408c31bfd724d5f9dac63f3cb09959561cf4e5 (BNB Smart Chain Network) | |
| − | + | XCH - xch1mgftqreqrswfq6m2r0lrt963jy6z7ylas9qw0g6l0ggyr8unpsyswe95m4 | |
| + | KDA - k:4ca147754957383afa70018db01beefd2017f1e68f25aff1ae17eae604c176e8 | ||
| + | LTNG - realtimer13@walletofsatoshi.com | ||
Latest revision as of 14:51, 12 May 2024
Cryptocurrency is decentralized digital money designed to be used over the internet. Bitcoin, which launched in 2008, was the first cryptocurrency, and it remains by far the biggest, most influential, and best-known. In the years since, Bitcoin and other cryptocurrencies like Ethereum have grown as digital alternatives to money issued by governments. There are now over 20,000 different cryptocurrencies in circulation.
The Blockchain
Cryptocurrency hinges on The Blockchain. It would not exist without it.
Short Explanation
“The blockchain” is a decentralized, immutable digital ledger that records transactions across a network, ensuring transparency and security in cryptocurrencies like Bitcoin.
Long Explanation
The cryptocurrency blockchain is a revolutionary technology that underpins digital currencies like Bitcoin. It functions as a decentralized, distributed ledger, recording and verifying transactions across a network of computers. Unlike traditional financial systems, there's no central authority; instead, a consensus mechanism ensures trust among participants.
Each block in the chain contains a batch of transactions, and once confirmed, it becomes immutable. This immutability ensures security and prevents tampering, making the blockchain highly transparent and resistant to fraud. Participants, called nodes, maintain copies of the entire blockchain, adding new blocks through complex cryptographic processes, like mining.
This innovation has far-reaching implications, extending beyond finance to supply chain management, voting systems, and more, due to its potential for secure, transparent record-keeping in various fields.
Blockchain Difficulty
This is one of the most important parts of mining to understand. ‘Difficulty’ is how the puzzle adjusts in order to maintain a level playing field and network stability. It takes a lot of computing power to create ‘hashes’ in order to try to solve the puzzle.
But if millions of people are all trying to solve the puzzle with lots of computing power, then the puzzle will get solved more quickly and more frequently, right?
Wrong. The network difficulty adjusts itself to maintain more or less the same block time (eg. ~10 minutes for Bitcoin), meaning more or less the same probability of validating a block. The more miners are mining (trying to solve the puzzle with their computer power) the harder the difficulty gets. When this happens, miners need even more computing power to solve the puzzle, so those who don’t have enough (older machines for example) either upgrade their hardware, buy more hardware, or stop mining (since the extra cost of hardware + electricity makes mining for them unprofitable or less profitable during the time difficulty is high).
So what happens then? Doesn’t that mean it’s not profitable for anyone?
Well then many miners stop mining since they are not profitable, but when miners start to drop off the network, the difficulty adjusts downwards (easier) and mining becomes more profitable again (less hashpower needed to solve the puzzle during when difficulty is easy, since less computer power is needed, resulting in lower operating cost), and the cycle repeats.
Transactions
Graphic image showing how bitcoin transactions work
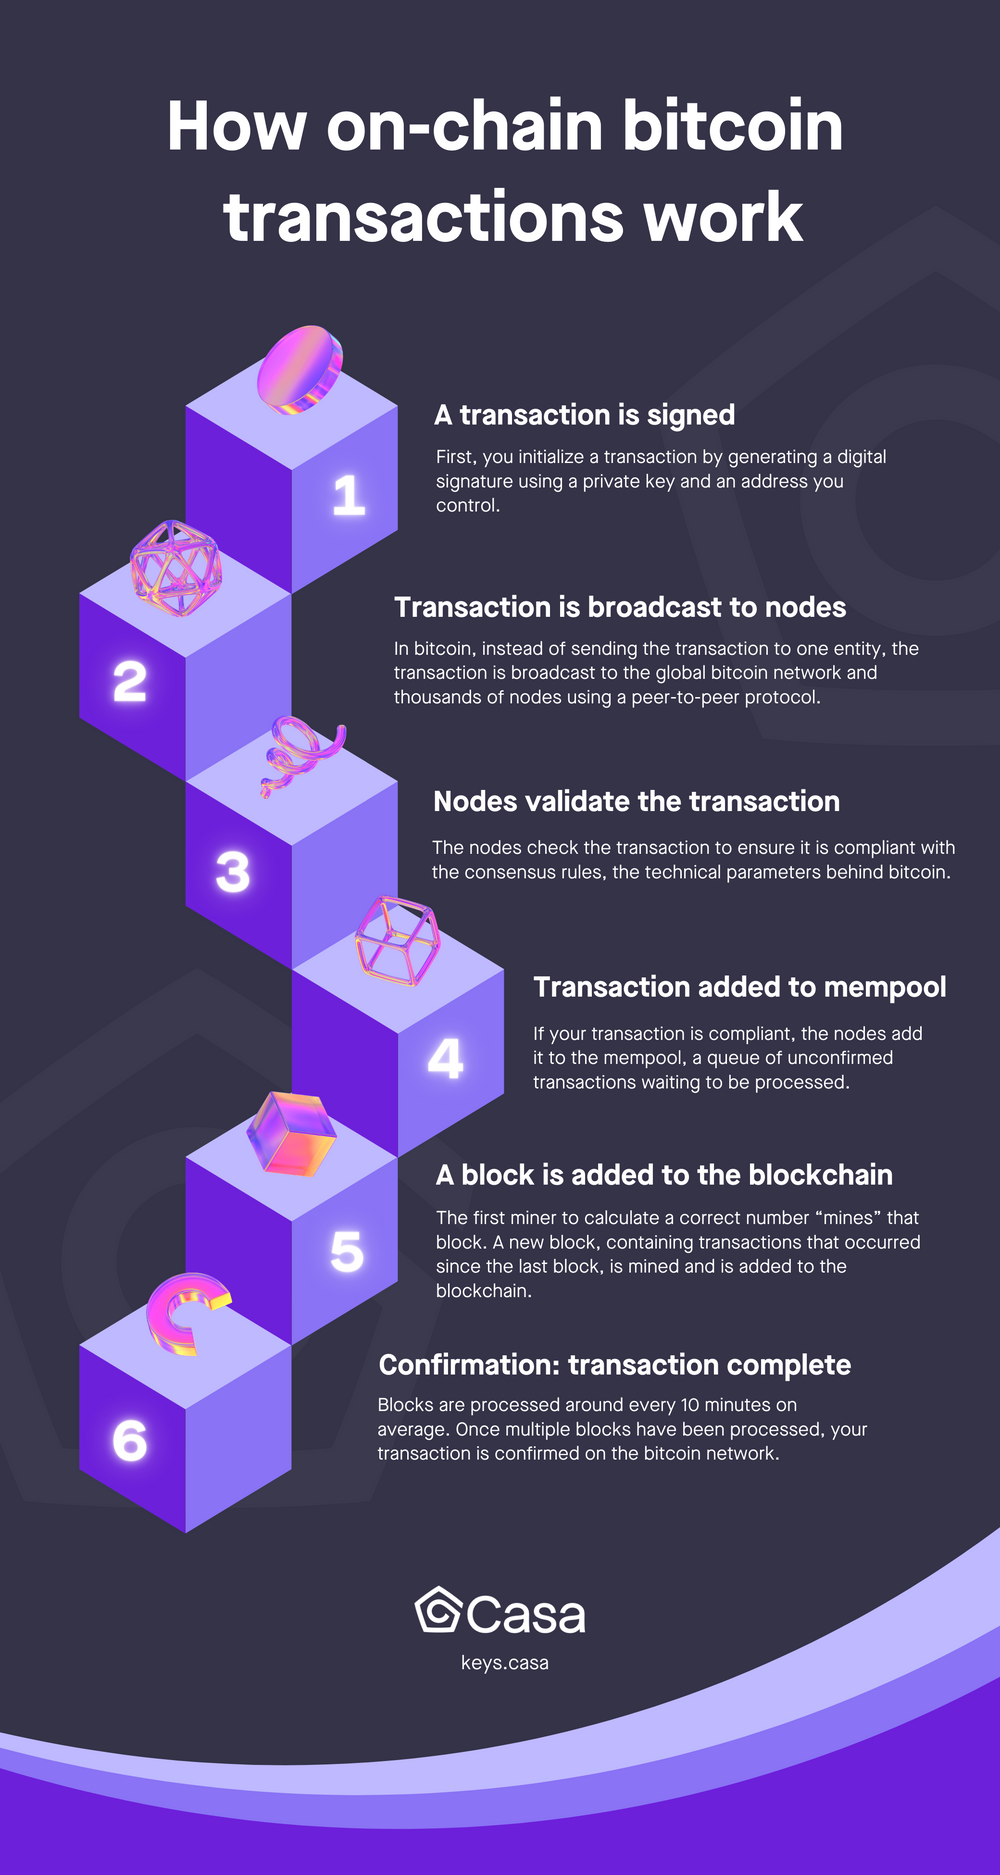
Buying
The easiest way to acquire cryptocurrency is to purchase on an online exchange like Coinbase, which is the world's most trusted and most secure platform to buy, sell and manage crypto.
Top Exchanges
United Kingdom FCA Approved Crypto Exchanges
https://www.finder.com/uk/uk-registered-cryptocurrency-exchanges
https://www.ccn.com/crypto-register-fca-uk-list-approved-firms/
https://register.fca.org.uk/s/search?predefined=CA
Buying Crypto Anonymously No KYC
Decentralised Bitcoin Exchanges.
Risks
https://www.coinbase.com/uk-fca-info
https://www.coinbase.com/asset-risks
Recurring Buys
Recurring buys are repeated, automatic purchases of cryptocurrency. By using dollar-cost-averaging (DCA) — investing a fixed amount of cash at regular time intervals, used commonly by investors — investing can be less risky. It is a good way of avoiding price fluctuation. Recurring buys use DCA to automatically carry out trades.
Recurring Buys And Why You Should Start Doing It With Your Crypto
Coinbase
You have the option to set up recurring buys for the assets of your choice. Acceptable payment methods include your cash balance (USD, GBP, EUR, etc.), ACH (US only), EBT (UK only), or 3D secure cards.
The following frequencies are offered:
- Daily: Every day starting the day you set up the recurring buy
- Weekly: Every week on the day that you set up the recurring buy
- 1st and 15th of the month: Twice a month (plus the day that you set up the recurring buy)
- Monthly: Every month on the 30th (plus the day that you set up the recurring buy)
Coinbase - How to set up recurring buys
Top Assets
- Bitcoin (BTC)
- Ethereum (ETC)
- Tether (USDT)
- Binance (BNB)
- US Dollar (USDC)
- Ripple (XRP)
- Solana (SOL)
- Cardano (ADA)
- Dogecoin (DOGE)
- Tron (TRX)
- Polkadot (DOT)
- Polygon (MATIC)
https://www.coinbase.com/browse
Bitcoin
Bitcoin was the first ever Cryptocurrency, created by Satoshi Nakamoto in Japan.
What Is a Satoshi?
The satoshi is the smallest denomination of the cryptocurrency bitcoin. It is named after Satoshi Nakamoto, the Bitcoin creator. The satoshi to bitcoin ratio is 100 million satoshis to one bitcoin.
Exchange Rate
BTC / GBP - how many bitcoins to get to £1
Exchanges
Binance
Coinbase to Binance with Zero Fees
Get USDT to Binance Spot Account for Auto Invest.
- Coinbase - Add Cash
- Coinbase - Buy USDC
- Binance - Receive USDC via Solana network - copy address
- Coinbase - Send USDC via Solana network - paste address
- Binance - Convert USDC to USDT
Convert
You can convert between cryptocurrency for free in Binance.
Convert from US Dollar Coin (USDC) to US Dollar Tether (USDT) with zero fees.
- Binance > Convert > Amount > Convert > Confirm
Then, you can use your USDT to run a Crypto Trading Bot.
Coinbase
Transfer
How do I move crypto between my Coinbase Wallet and Coinbase.com account? | Coinbase Help
Transfer from Coinbase to Binance for FREE
Use the MATIC Polygon network to move US Dollar Coin (USDC) from Coinbase to Binance with zero fees.
- Binance > Wallet Overview > Deposit > Crypto Deposit > Select Coin > USDC > Select Network > MATIC Polygon > Deposit Address > Copy
- Coinbase > My Assets > USD Coin > Click the 3 dots > Send > Amount > Paste Address (from Binance) > Continue > Change Network > MATIC Polygon > Send
API
Prices
curl -s https://api.coinbase.com/v2/prices/ETH-USD/spot | jq -r .data.amount
KuCoin
Moving Assets From ProBit Global To KuCoin
- [ProBit] trade sell your BTG for USDT
- [KuCoin] deposit USDT and select the Arbitrum One network to get an address
- [ProBit] withdraw USDT and select Blockchain Type Arbitrum One then paste address
- [ProBit] check the fee (should be about 0.14 USDT which right now is the cheapest) and click Withdraw button
AI
Spot Grid AI Plus - KuCoin Trading Bots
BotCrypto - Crypto Trading Bots
Trading
Bots
What Is a Crypto Trading Bot?
A crypto trading bot is a computer program that uses artificial intelligence and advanced algorithms to automate the buying and selling of cryptocurrencies. Acting as a virtual assistant, these bots analyze vast amounts of market data, identify patterns, and execute trades in the crypto market accordingly. They can simplify the trading process and provide a competitive edge by leveraging real-time and historical market data.
Much like the crypto market that never sleeps, crypto trading bots can operate 24/7, taking advantage of market opportunities even when you cannot actively monitor the market. By automating trading actions, these bots aim to optimize trading strategies, improve efficiency, and potentially increase profits.
How Do Trading Bots Work?
There are two kinds of crypto bots: one that needs to connect to cryptocurrency exchanges like KuCoin, where they can access real-time and historical market data, and the other that is offered directly by crypto exchanges on their platforms like KuCoin’s trading bots, which require no technical expertise to configure. By setting predefined parameters and trading strategies, you can configure your bots to execute trades automatically when specific market conditions are met.
https://www.kucoin.com/learn/trading/what-are-crypto-trading-bots
What are the types of Crypto Trading Bot?
Spot Grid - Spot grid trading bot is particularly effective in ranging crypto market conditions. It thrives when the prices of cryptocurrencies move within a certain range, as the grid structure enables users to profit from the recurring price oscillations that are characteristic of such market conditions. By intelligently placing buy and sell orders within this range, the KuCoin Spot Grid trading bot excels in harnessing price movements and market trends, making it a valuable tool for traders seeking to navigate and capitalize on a range-bound cryptocurrency market.
Martingale - KuCoin’s Martingale trading bot implements a high-risk, high-reward strategy. It increases the trade size after a losing trade, aiming to recover losses with larger subsequent trades. This strategy requires careful risk management to prevent significant loss. The KuCoin Martingale trading bot automates the Martingale strategy, allowing you to capitalize on the volatility of crypto markets. The bot buys more when prices fall and sells when prices rise, effectively betting on the reversal of a downtrend. It is best suited for traders who are willing to take calculated risks and believe in their chosen crypto asset's potential to recover from lows. The bot operates 24/7, adjusting its trading volumes based on price movements, and is free to use, with the only charges being transaction costs incurred during the buying and selling of cryptos.
https://www.kucoin.com/trading-bot/spot/grid
Pionex
How do I transfer assets from Coinbase to Pionex?
Links
A Complete Guide to Cryptocurrency Trading for Beginners
Investocks - Investocks allows you to actively invest in most popular cryptocurrencies such as Bitcoin, Ethereum, Ripple, Litecoin and more, profit from market rallies and declines, or hedge your existing cryptocurrency holdings.
Swapping
Lightning Loop - Loop In and Loop Out
Selling
Cashing Out Your Crypto Balance
Coinbase
- Sell your crypto to your chosen fiat currency
- Click on the fiat currency row
- Use the right hand side SELL OUT box
- Follow the instructions to transfer the money to your bank
Coinbase - Cash out your balance
Binance
VIDEO - How to withdraw GBP from Binance using P2P
How to withdraw GBP from Binance using P2P
DO THIS ON YOUR MOBILE PHONE APP
This is a way to move your money from Binance to an external fiat bank account. It is quite complex but it is safe because Binance guides you through the process and you do not release you crypto until you confirm you have received your fiat to your bank account.
- Convert your wallet balance to USDT
- Transfer the amount of USDT you want to withdraw to your Funding account - Assets > Spot > USDT > Transfer > Funding
- Home > P2P or Icon top left > More Services > Trade > P2P
- Make sure the currency to want to use is GBP in the top right next to the horizontal arrows icon
- Click on the Sell tab and make sure USDT is selected
- This will show you all the peers or 'buyers' for your crypto
- Click on Amount to narrow the filter by £x amount - e.g. £10
- Choose the peer that has the highest amount of trades, completion ratio and 100% feedback
- Click on Sell button and choose 'By Crypto'
- Select the Payment Method and Add Bank Account details (you will notice that the Sort Code is missing)
- Choose the amount of USDT to sell and click on Sell USDT
- Now it will show Waiting for Buyer's Payment
- Keep an eye on the yellow chat icon for a message from the buyer
- When a message arrives, click on the chat icon and type in your bank's Sort Code when asked
- Keep watching for any other messages from the buyer
- Eventually (this took 30 minutes for NatWest) you will see a message from Coinbase confirming that the £GBP has been sent to your bank account
- Switch to your bank app and check that the £GBP have arrived from the same name as shown on Binance P2P
- When you are happy, go back to the Binance app and click Payment Received and confirm twice
- Leave some positive feedback for the trader and that's it!
Staking
Staking is a process by which individuals lock their cryptocurrency (their "stake") to support the security and operation of a blockchain network. When someone stakes their coins, they are essentially helping to secure the chain and validate transactions on the blockchain.
Staking is only possible on blockchains such as Ethereum and Cardano based on a proof-of-stake (PoS) consensus mechanism. PoS differs from the proof-of-work (PoW) used in cryptocurrencies such as Bitcoin, where miners use computing power to validate transactions. Staking coins makes users' holdings less liquid because the coins are tied up in the staking process.
Individuals can usually still access their staked coins but may only be able to use them for other purposes once they are no longer staked. You can unstake your crypto at any time, and your crypto is always yours.
Example rates ...
- Solana = 4.35%
- Ethereum = 3.29%
- Cardano = 2.00%
Coinbase Help - Earn Rewards with Staking
Binance Help - What is Staking?
Stablecoins
Stablecoins are tokens pegged to an external asset, such as gold or the U.S. dollar, which ensures price stability. These coins are usually backed by the external asset, commonly USD, minimizing risk. Nonetheless, some stablecoins are collateralized by other cryptocurrencies, which elevates the risk factor. Stablecoins are generally less volatile. For instance, USDC remains fixed at $1 and is supported by numerous financial institutions. In a highly unstable market, stablecoins offer stability by being collateralized.
- US Dollar Coin (USDC) = 4.60%
Wallets
What is a crypto wallet?
Crypto wallets allow you to store, send, and receive cryptocurrencies.
Wallets are usually either hot, cold, or centralized:
- Hot wallets connect to the internet and are usually easy to use
- Cold wallets do not connect to the internet and offer the best security
- Centralized wallets, such as exchanges, are controlled by third parties
When using a crypto wallet, the crypto is not stored in the wallet but on the blockchain. Crypto wallets use your secret recovery phrase to access and interact with your funds on the blockchain.
How do Crypto Wallets work?
The beauty of a crypto wallet is down to the fact that it does not store any actual money on it. When you create a crypto wallet, the software (like those listed below) generates a key from a 12 or 24 word 'seed phrase' and embeds this key in the blockchain - so it knows what the wallet is for and what it contains. There is NO name or email address or password involved. This is constantly being verified IN the blockchain and updated to match what you have in your wallet. Which means, you can install ANY crypto wallet software, import your unique 12 word key and your balance will be shown.
Seed Phrase Words
These words are chosen from a total of 2048 recovery words defined in the BIP39 standard.
This MUST be written down, or etched in Steel. No seriously, really etched in actual steel - because this is fireproof. Then, this must be kept in a VERY safe place - given to a relative.
This is your cryptocurrency - those 12 words are the key to your money.
It's as simple and as paranoid as that.
Software (Hot)
This is an app running on your phone, tablet or computer which creates a software based wallet
Blue Wallet with Lightning Pay
Wallet of Satoshi - Bitcoin Lightning Wallet
Hardware (Cold)
A crypto hardware wallet is a secure physical device for storing and managing cryptocurrency private keys offline.
https://www.howtogeek.com/804636/best-crypto-hardware-wallet/
Electronic Wallets
Crypto Seed Phrase Secure Storage
Clever and cheap do it yourself.
Even nicer
https://incoherency.co.uk/blog/stories/diy-cryptosteel-capsule.html
Commercial
https://cryptosteel.com/product/cryptosteel-capsule-solo/
https://bitbox.swiss/steelwallet/
Lightning
The Lightning Network is designed to make bitcoin transactions as fast and cheap as possible. It is part of a newer class of crypto technologies known as "layer 2" blockchains, which you can think of as being a little like HOV lanes on highways. By offloading some transaction "traffic" to the Lightning Network's "layer 2" blockchain, the core Bitcoin blockchain ("layer 1") can move faster.
https://bluewallet.io/lightning/
Miscellaneous
Desktop wallet
Sparrow Wallet (https://www.sparrowwallet.com) - superb! Nun-chuk (https://nunchuk.io)
Mobile wallet (on-chain)
Nun-chuk (https://nunchuk.io)
Mobile wallet (lightning)
Wallet of Satoshi (https://www.walletofsatoshi.com) Phoenix (https://phoenix.acinq.co) Muun (https://muun.com) Zeus - good for connecting to your own node (https://zeusln.app)
Atomic swaps (for on-chain to lightning conversion)
Boltz (https://boltz.exchange/swap)
Hardware wallets
Coldcard (https://coldcard.com) - expensive but the best imho Trezor (https://trezor.io) Ledger (https://www.ledger.com)
Tax
UK Tax Law - Easily sync wallets and prepare HRMC forms
Hodling
Bitcoin hodling is a strategy that involves continuous storage of bitcoins as a way to mitigate volatility and make considerable returns. While this method takes a lot of time to show tangible results and requires patience, it is one of the safest and most solid ways to take advantage of Bitcoin.
Spending
There are an ever growing number of ways to spend your crypto :-)
BitRefill - Buy Vouchers, Gift Cards and Top-Up Mobile Phones with Cryptocurrency!
Business and Accepting Payments
Coinos - an easy Bitcoin web wallet for shops
Bridge 2 Bitcoin - why accept Bitcoin in my Business?
Node
What Is A Full Node?
A full node is a program that fully validates transactions and blocks. Almost all full nodes also help the network by accepting transactions and blocks from other full nodes, validating those transactions and blocks, and then relaying them to further full nodes.
Most full nodes also serve lightweight clients by allowing them to transmit their transactions to the network and by notifying them when a transaction affects their wallet. If not enough nodes perform this function, clients won’t be able to connect through the peer-to-peer network—they’ll have to use centralized services instead.
Many people and organizations volunteer to run full nodes using spare computing and bandwidth resources—but more volunteers are needed to allow Bitcoin to continue to grow.
Bitcoin Node
https://bitcoin.org/en/full-node#what-is-a-full-node
Umbrel
Install ubuntu on a Raspberry Pi 5 with a business grade NVMe SSD and well ventilated case (like the Argon M.2 v3) then run the script ...
curl -L https://umbrel.sh | bash
Lightning Node
https://github.com/lightningnetwork/lnd
https://www.bitcoinmarketjournal.com/bitcoin-lightning-network-node/
https://github.com/ACINQ/eclair
Zeus Wallet - connects to your own Lightning node
Liquidity
Magma by Amboss - Buy Inbound Liquidity
How To Rebalance Your Lightning Node Channels
Security and Safety
Mining
What is Bitcoin Mining?
Bitcoin mining is the process of adding new transactions to the blockchain, a public ledger of all Bitcoin transactions. This is done by using powerful computers to solve complex mathematical equations that verify the authenticity of the transactions and add them to the blockchain. Miners are rewarded with newly created bitcoins for their efforts, known as a "block".
What is Cryptocurrency Mining?
Cryptocurrency mining is the process of validating transactions and adding them to a blockchain by solving complex mathematical puzzles, typically done using powerful computers to earn rewards.
Mining is the process that Bitcoin and several other cryptocurrencies use to generate new coins and verify new transactions. It involves vast, decentralized networks of computers around the world that verify and secure blockchains - the virtual ledgers that document cryptocurrency transactions.
The more powerful your computer, the more "hash rate" it has and can contribute a higher percentage of solving the puzzle and gain a higher reward.
Crypto mining is a calculation-intensive, puzzle-solving-like computation process that requires high processing power along with high electricity consumption. The miner who first solves the puzzle gets to place the next block on the blockchain and claim the rewards. Rewards include the miner becoming the owner of the newly released bitcoin, or getting fees linked to the transactions performed in the block.
At the earliest days of the mining, any processor or GPU had the sufficient power required for finding many solutions per day and getting a reward for the detected block.
With an increase of the interest in cryptocurrencies, the difficulty level of the "puzzles" also increased, and a standalone PC could not find many solutions anymore.
Difficulty level was rising because the reward for the newfound block was growing as well as its equivalent in value. That was the time when miners decided to unite their efforts and create the mining pools.
Therefore, even weak devices that are working simultaneously on solving the same "puzzle" have a chance to find its solution which would enable miners to create a new block.
Mining pools get solutions from all the connected miners, and if one of those numerous solutions appears to be a proper one, the pool gets a reward for the created block. This reward is shared proportionally to the efforts applied by the miners and forwarded to their wallets.
Farm > Rig > Worker
The miner, or worker, can be either CPU, GPU or ASIC based.
- CPU = Central Processing Unit
- GPU = Graphics Processing Unit
- ASIC = Application Specific Integrated Circuit
Today, there are thousands of dedicated farms around the world running millions of rigs.
How Many Bitcoins Are There?
- 19,489,350 = Total BTC in Existence
- 1,510,650 = Bitcoins Left to Be Mined
- 92.806% = Percentage of Bitcoins Issued
- 900 = New Bitcoins per Day
Hash Rate
How Is The Hash Rate Measured & its Unit?
Hash rate is a unit measured in hashes per second or [h/s] and here are some usual denominations used to refer it.
Hash rate denominations
1 kH/s is 1,000 (one thousand) hashes per second - "kilohash".
1 MH/s is 1,000,000 (one million) hashes per second - "megahash".
1 GH/s is 1,000,000,000 (one billion) hashes per second - "gigahash".
1 TH/s is 1,000,000,000,000 (one trillion) hashes per second - "terahash".
1 PH/s is 1,000,000,000,000,000 (one quadrillion) hashes per second - "petahash".
1 EH/s is 1,000,000,000,000,000,000 (one quintillion) hashes per second - "extahash".
List of Mining Pools
Braiins Pool - superb!
NEWS / Volcanic El Salvador Mining Pool
Luxor Technologies Volcanic Energy Mining Pool
Coins To Mine
Bitcoin
...
Ethereum
...
Dynex
https://dynexcoin.medium.com/dynex-how-to-setup-a-node-and-local-dnx-wallet-3cf99e099820
https://dynexcoin.medium.com/how-to-mine-dnx-on-hiveos-81e2824f2476
Rainbow Miner
Rainbow Miner completely automates the mining experience by analysing your CPU and GPU then testing it on all the pools. It will then report back with the most profitable combination of Pool + Coin + Miner + Algorithm to get you the best BTC revenue return. Just, amazing.
There is a version for all operating systems, a simple step-by-step guide, nice command line and web interface. It has doubled my returns for my low-end NVIDIA GTX 1060 3GB cards using NiceHash + BTC + MiniZ + ZHash.
LOCKED
to NiceHash-Equihash24x5-
(press L to unlock)

Last Speed   Active        Started   Miner   Algorithm          Coin   Device         Pool       Power Command
----------   ------        -------   -----   ---------          ----   ------         ----       ----- -------
75.19  H/s   00d/16h/42m   3 Times   MiniZ   Equihash (144,5)   -      GTX 1060 3GB   NiceHash   220W  Bin/NVIDIA-MiniZ/miniZ --nvidia
                                                                                                       --telemetry=33020 -cd 0 1 --url=NHbLd5exQeCGGy
                                                                                                       WnopVoLHLbzexKN5z8iq7p.paullyrainbowminer@zhas
                                                                                                       h.auto.nicehash.com:9200 -p x --pers=auto
                                                                                                       --gpu-line --extra --latency --nocolor
                                                                                                       --nohttpheaders --par=144,5
How do I add RainbowMiner's start script to crontab on Linux for autostart?
As the user that will be running RainbowMiner, edit the crontab file using crontab -e. You will be promped to select the editor you want to use (emacs, vi, etc.) Add one of the following lines to the end of the file and save: - @reboot /PATH_TO_RAINBOWMINER/start-screen.sh If you want RainbowMiner to start in a separate screen - @reboot /PATH_TO_RAINBOWMINER/start-nohup.sh If you want RainbowMiner to run as a background process where PATH_TO_RAINBOWMINER is the RainbowMiner installation directory.
GPU Mining Rig
- Frame
- Motherboard
- CPU
- RAM
- Power Supply
- Cables
- PCIe Riser Boards
- Graphics Cards
Frame
Motherboard
CPU
4 × Intel(R) Core(TM) i3-6100 CPU @ 3.70GHz
RAM
8GB
Power Supply
1800W Mining Power Supply Cooling PSU For 8GPU ATX BTC Eth Rig Ethereum Miner ~ £60
Cables
PCIe Riser Boards
VER009S PCI-E Riser Card PCIe 1x to 16x USB 3.0 Data Cable Mining RVN Minin UK
Graphics Cards
- NVIDIA 1080 x 6
- AMD RX580 x 6
Coin
Hard Drive Mining
What Is Hard Drive Mining?
Hard drive mining is a way of generating cryptocurrency using the storage space of hard disk drives. HDD miners do not require graphics processing units (GPUs) or ASIC miners, like in traditional mining farms, to produce new blocks in the distributed ledger. Instead, this method uses a set of hard disk drives and unused storage space, also known as proof of capacity.
Practically any device with loads of storage space can be used in HDD mining, as it needs less computational power than the Proof of Work, thus using less energy in the long term. New data blocks are generated when miners use their hard disks in the distributed ledger and, accordingly, get rewarded.
https://coindoo.com/hard-drive-mining/
Chia
Chia is a cryptocurrency and blockchain with smart transaction capabilities. It was designed from the ground up to make cryptocurrency easier to use (and harder to lose) than cash.
The 'Proof of Space and Time' is the only Nakamoto consensus algorithm since Proof of Work, while also having a much lower energy consumption. Part of Chia's vision involves improving the carbon footprint of the blockchain industry.
Chia Buying
https://coincodex.com/how-to-buy-chia-network/
Chia Farming
Chia plotting and farming can seem daunting at first, but it's a relatively straightforward process:
- Obtain hardware
- Install Chia
- Run and configure Chia
- Create a plot
- Start farming
Pools and Payouts
When you join a pool, you are given a 'payout address' which is generated from your main 'Chia Wallet'.
When you farm to a pool, you gradually build up mojo and when the minimum amount of mojo has been farmed (or mined) then the Pool will payout to your address.
You then view your wallet balance and can send your mojos to an external exchange address.
To make this process quicker, you can change your Pool's payout address to that external exchange address.
Here are the cli commands to do all of this in the Linux terminal:-
1. Make sure your database in fully synced ...
chia show --state
2. Show your wallet with the balance ...
chia wallet show
3. Show the pools you have joined and are mining to ...
chia plotnft show
4. Change the pool's payout address ...
chia plotnft change_payout_instructions --launcher_id 2bb32xxxxxxxxxxxxxxxxxxxxxxxxxxxxxxx62738a --address xch1xxxxxxxxxxxxxxxxxxxxxxxxxxxxxxxxxxxxx95m4
5. Send mojos to an external address ...
chia wallet send --amount 0.002261969048 --fee 0.000000000001 --address xch1xxxxxxxxxxxxxxxxxxxxxxxxxxxxxxxxxxxxx95m4
Hardware
... own built ...
- Raspberry Pi 4 4GB or NanoPC T4
- nVME or SSD Drive for the OS and plotting
- xTB Hard Disk Drive for the storage
NanoPC T4
- https://wiki.friendlyelec.com/wiki/index.php/NanoPC-T4#Boot_from_SD_Card
- https://drive.google.com/drive/folders/1XuQJbgdFupQy8DjJTQD7iufgYbMNAX9A
DISKS
k=32 is now the minimum plot size that will be eligible for mainnet at the end of the year. More here.
Storage requirements
K-size   Temp. Size            Final Size
K=32     239 GiB (256.6 GB)    101.4 GiB (108.9 GB)
K=33     512 GiB (550 GB)      208.8 GiB (224.2 GB)
K=34     1041 GiB (1118 GB)    429.8 GiB (461.5 GB)
K=35     2175 GiB (2335 GB)    884.1 GiB (949.3 GB)
When planning on how much plotting space is required, only calculate the temporary disk size requirement.
I followed these instructions ...
https://chiadecentral.com/nuc-small-form-factor-plotting-build/
- SD = Operating System Drive (/dev/mmcblk1)
- SSD = Temporary Plotting Drive (/dev/nvme0n1)
- HDD = Permanent Storage Drive (/dev/sda)
dmesg
lsblk
ll /dev/nvme0n1
apt -y install xfsprogs
mkfs.xfs /dev/nvme0n1
mkdir /mnt/ssd
mount -v -t xfs -o discard /dev/nvme0n1 /mnt/ssd
ll /dev/sda
mkfs.ext4 -m 0 -T largefile4 -L chia-plots /dev/sda
mkdir /mnt/hdd
mount -v -t ext4 /dev/sda /mnt/hdd
nano /etc/fstab
/dev/nvme0n1 /mnt/ssd xfs defaults 0 0
/dev/sda /mnt/hdd ext4 defaults 0 0
reboot
... prebuilt ...
Software
- official Chia OS for Windows, macOS, Linux and Raspberry Pi (or similar ARM based SoC)
Instructions
CLI
- https://docs.chia.net/installation#cli
- https://docs.chia.net/cli/
- https://github.com/Chia-Network/chia-blockchain/wiki/CLI-Commands-Reference
PREPARE
Download the huge ~80Gb database file, for use later ...
INSTALL
As root user ...
sudo -i
apt-get install ca-certificates curl gnupg
curl -sL https://repo.chia.net/FD39E6D3.pubkey.asc | gpg --dearmor -o /usr/share/keyrings/chia.gpg
apt-get update
echo "deb [arch=$(dpkg --print-architecture) signed-by=/usr/share/keyrings/chia.gpg] https://repo.chia.net/debian/ stable main" | tee /etc/apt/sources.list.d/chia.list
apt-get update
apt-get install chia-blockchain-cli
logout
TEST
As regular user ...
which chia
chia version
chia --help

Usage: chia [OPTIONS] COMMAND [ARGS]...

  Manage chia blockchain infrastructure (2.1.0)

Options:
  --root-path PATH            Config file root  [default:
                              /home/plittlefield/.chia/mainnet]
  --keys-root-path PATH       Keyring file root  [default:
                              /home/plittlefield/.chia_keys]
  --passphrase-file FILENAME  File or descriptor to read the keyring
                              passphrase from
  -h, --help                  Show this message and exit.

Commands:
  completion  Generate shell completion
  configure   Modify configuration
  data        Manage your data
  db          Manage the blockchain database
  dev         Developer commands and tools
  farm        Manage your farm
  init        Create or migrate the configuration
  keys        Manage your keys
  netspace    Estimate total farmed space on the network
  passphrase  Manage your keyring passphrase
  peer        Show, or modify peering connections
  plotnft     Manage your plot NFTs
  plots       Manage your plots
  plotters    Advanced plotting options
  rpc         RPC Client
  run_daemon  Runs chia daemon
  show        Show node information
  start       Start service groups
  stop        Stop services
  version     Show chia version
  wallet      Manage your wallet

  Try 'chia start node', 'chia netspace -d 192', or 'chia show -s'
START
Set up the configuration ...
chia init
Which will create these directories and files ...
/home/user/.chia
`-- mainnet
    |-- config
    |   |-- config.yaml
    |   |-- config.yaml.lock
    |   `-- ssl
    |       |-- ca
    |       |   |-- chia_ca.crt
    |       |   |-- chia_ca.key
    |       |   |-- private_ca.crt
    |       |   `-- private_ca.key
    |       |-- crawler
    |       |   |-- private_crawler.crt
    |       |   `-- private_crawler.key
    |       |-- daemon
    |       |   |-- private_daemon.crt
    |       |   `-- private_daemon.key
    |       |-- data_layer
    |       |   |-- private_data_layer.crt
    |       |   |-- private_data_layer.key
    |       |   |-- public_data_layer.crt
    |       |   `-- public_data_layer.key
    |       |-- farmer
    |       |   |-- private_farmer.crt
    |       |   |-- private_farmer.key
    |       |   |-- public_farmer.crt
    |       |   `-- public_farmer.key
    |       |-- full_node
    |       |   |-- private_full_node.crt
    |       |   |-- private_full_node.key
    |       |   |-- public_full_node.crt
    |       |   `-- public_full_node.key
    |       |-- harvester
    |       |   |-- private_harvester.crt
    |       |   `-- private_harvester.key
    |       |-- introducer
    |       |   |-- public_introducer.crt
    |       |   `-- public_introducer.key
    |       |-- timelord
    |       |   |-- private_timelord.crt
    |       |   |-- private_timelord.key
    |       |   |-- public_timelord.crt
    |       |   `-- public_timelord.key
    |       `-- wallet
    |           |-- private_wallet.crt
    |           |-- private_wallet.key
    |           |-- public_wallet.crt
    |           `-- public_wallet.key
    `-- db
        `-- blockchain_v2_mainnet.sqlite

14 directories, 35 files
Then unpack the downloaded ~100Gb database file to the ~/.chia/mainnet/db directory ...
tar -xzvf mainnet.2023-10-01.tar.gz --directory ~/.chia/mainnet/db
mv ~/.chia/mainnet/db/./blockchain_v2_mainnet.2023-06-30.sqlite ~/.chia/mainnet/db/blockchain_v2_mainnet.sqlite
Or, if you have downloaded on another computer, then you can rsync it across your local network with these LARGE FILE tweaks ...
rsync --inplace --partial -zavP /home/myuser/.chia/mainnet/db/ nanopc-t4-1:/mnt/ssd/chia/mainnet/db/
Generate keys ...
If you don't have a key and wallet already ...
chia keys generate
If you want to use an existing key and wallet ...
chia keys add
Check your keys with ...
chia keys show
Show your seed phrase with ...
chia keys show --show-mnemonic-seed
Edit the config file, and change the database_path under the full_node to match your ~100Gb database file name ...
rm ~/.chia/mainnet/config/config.yaml.lock
nano ~/.chia/mainnet/config/config.yaml
  database_path: db/blockchain_v2_mainnet.sqlite
Start the farmer ...
chia start farmer
Check status, and it should show the Syncing as nearly complete ...
chia show --state

Network: mainnet    Port: 8444   RPC Port: 8555
Node ID: 37b42984f49a9ce0b9fd04321d6e2c85cbdfe3a5c63c5e2afdefce7c649c0f4f
Genesis Challenge: ccd5bb71183532bff220ba46c268991a3ff07eb358e8255a65c30a2dce0e5fbb
Current Blockchain Status: Syncing 4310193/4341308 (31115 behind).
Peak: Hash: 8f8d60f439d633bb5a8cbf82de4f4d7480e0334ef7109fc5bab332a91b345b3a
     Time: Mon Oct 02 2023 00:01:22 BST                  Height:    4310193
There, you've just saved yourself 3 days waiting :)
Eventually, you will receive a 'Full Node Synced' message ...
chia show --state

Network: mainnet    Port: 8444   RPC Port: 8555
Node ID: 37b42984f49a9ce0b9fd04321d6e2c85cbdfe3a5c63c5e2afdefce7c649c0f4f
Genesis Challenge: ccd5bb71183532bff220ba46c268991a3ff07eb358e8255a65c30a2dce0e5fbb
Current Blockchain Status: Full Node Synced

Peak: Hash: dc99c1219ce925747c6028ab2c8b7b1d235e811b77251c5a8151d5c90697989e
      Time: Sun Oct 08 2023 20:28:46 BST                  Height:    4341814

Estimated network space: 29.678 EiB
Current difficulty: 2672
Current VDF sub_slot_iters: 147849216

  Height: |   Hash:
  4341814 | dc99c1219ce925747c6028ab2c8b7b1d235e811b77251c5a8151d5c90697989e
  4341813 | 1f9417bbc9f2776d6880fb3a03618776162297f2eb3369e9396e0a1b9f559b3e
  4341812 | 9e7526e71c4f315c72a7975a399cf7566ba50dd4257729997ce6041c052f6caa
  4341811 | 1d9ded9981d08d475bd8c52f886b93e18ef0b56161ed0d05c8e4603d1872131e
  4341810 | e05bec2ef568225ce50fe1eda2e06a2d863a2959e2890f7a6b4d777394da1bb1
  4341809 | 6534fd46f6153e5772244e1b9c644bf185d3bbee306f371f5b392ab49927b25f
  4341808 | c14449b83280c7f5734aba234b3756b6ed71278781cb71157c8d9dc603927cf1
  4341807 | 5fc3b07c6bb30678fdbe55d93ae49ac47b48f65c8f1c3b3a2d343ca8d4adfcbd
  4341806 | 2ce9ed9ade9700705c300f091c0446ed33a633d35bcbad0d66a6508b3ef1f130
  4341805 | 93c46d0f5368628563f3b39b0c2860bad349e63a25c5fa54ab48dd18d0d55cec
NEED TO WRITE UP THE WHOLE FAUCET THING BY CLI
WALLET
chia wallet show
POOLS
Connect to a pool using your 1 mojo from the faucet ...
chia plotnft create -s pool -u https://eu1.pool.space -m 0.000000000001
Check after 5 minutes ...
chia plotnft show

Wallet height: 4346464
Sync status: Synced
Wallet ID: 3
Current state: FARMING_TO_POOL
Current state from block height: 4296262
Launcher ID: 57d0a97fec7fa6b1ae12aa9d910836a4d680749148808661944d634bdaed74e8
Target address (not for plotting): xch19ukfhgdjx9w5zw5jkhcrf7sr9qkvhgtk0lv6u7c5m9ptj60dt4tscqkmna
Number of plots: 0
Owner public key: 8a972c7e5a0966fd9e83d71d68ae9cd6c524ea64ba4c2a6ac0178c0c69406d2678411d220926129b4004d07bbc83dd5f
Pool contract address (use ONLY for plotting - do not send money to this address): xch1wtgw6rzvnqzn8c93scg04qzzft3539aqwd5fz7exp3vlawq8syaqjqm6ne
Current pool URL: https://eu1.pool.space
Current difficulty: 1
Points balance: 0
Points found (24h): 0
Percent Successful Points (24h): 0.00%
Payout instructions (pool will pay to this address): xch1e86h67gwnheq4aeg65pln2grvyrsl90c58hkhtnjf47t4qk5sm0skm9eju
Relative lock height: 64 blocks
PLOT
Syntax ...
chia plotters software -t <temp dir> -d <destination dir> -f <farmer key> -c <contract address> -k <size> -n <number of plots>
e.g.
chia plotters madmax -t <temp dir> -d <destination dir> -f <farmer key> -c <contract address> -k <size> -n <number of plots>
chia plotters chiapos -t <temp dir> -d <destination dir> -f <farmer key> -c <contract address> -k <size> -n <number of plots>
Obtain your farmer key and contract address from ...
chia keys show |grep 'Farmer'
chia plotnft show |grep 'contract'
Now you can actually start plotting ...
chia plotters madmax -t /mnt/ssd/chia/temp/ -d /mnt/ssd/chia/plots/ -f 93c479a2de1e982f6b8cc15373e67ff851bf916ac10e91cb2cf1c512214a262697e9144a4a2202bd6e1c0a389779788d -c xch1wtgw6rzvnqzn8c93scg04qzzft3539aqwd5fz7exp3vlawq8syaqjqm6ne -k 32 -n 1

Multi-threaded pipelined Chia k32 plotter - 2092041
Network Port: 8444
Final Directory: /mnt/ssd/chia/plots/
Number of Plots: 1
Crafting plot 1 out of 1 (2023/10/09 21:02:40)
Process ID: 111640
Number of Threads: 4
Number of Buckets P1:    2^8 (256)
Number of Buckets P3+P4: 2^8 (256)
Pool Puzzle Hash:  72d0ed0c4c980533e0b18610fa80424ae34897a07368917b260c59feb807813a
Farmer Public Key: 93c479a2de1e982f6b8cc15373e67ff851bf916ac10e91cb2cf1c512214a262697e9144a4a2202bd6e1c0a389779788d
Working Directory:   /mnt/ssd/chia/temp/
Working Directory 2: /mnt/ssd/chia/temp/
Plot Name: plot-k32-2023-10-09-21-02-1743d30146802207b7ea48945d631d430118fa0ad9e7245d84ca97f31f653115

[P1] Table 1 took 175.051 sec
Progress update: 0.01
[P1] Table 2 took 928.383 sec, found 4294918581 matches
Progress update: 0.06
MadMax is VERY CPU intensive and can quickly cause issues.
The original plotter 'chiapos' is less intensive ...
chia plotters chiapos -t /mnt/ssd/chia/temp -d /mnt/hdd/chia/plots -f 93c479a2de1e982f6b8cc15373e67ff851bf916ac10e91cb2cf1c512214a262697e9144a4a2202bd6e1c0a389779788d -c xch1dp7qxxfhwq6s4ed2psn9mxk4rw0fpzk02elm82w3wqr2eg4rqfcqhtp725 -k 32 -n 1
Check with ...
chia farm summary

Farming status: Farming
Total chia farmed: 0.0
User transaction fees: 0.0
Block rewards: 0.0
Last height farmed: 0
Local Harvester
  0 plots of size: 0.000 MiB on-disk, 0.000 MiBe (effective)
Plot count for all harvesters: 0
Total size of plots: 0.000 MiB, 0.000 MiBe (effective)
Estimated network space: 29.587 EiB
Expected time to win: Never (no plots)
Note: log into your key using 'chia wallet show' to see rewards for each key
UPDATE - NOVEMBER 2023 - NEW COMMAND
This stops the error 'unhandled exception'...
Starting phase 3/4: Compression from tmp files into "/mnt/ssd/chia/temp/plot-k32-2023-11-06-09-45-23926d44e35588e3407f2937f0a5e9bbbbf34120b8ba72443bd5320b738bf4a5.plot.2.tmp" ... Tue Nov  7 08:21:53 2023
Compressing tables 1 and 2
Progress update: 0.660
Caught plotting error: std::bad_alloc
Traceback (most recent call last):
  File "chia/cmds/chia.py", line 139, in <module>
  File "chia/cmds/chia.py", line 135, in main
  File "click/core.py", line 1130, in __call__
  File "click/core.py", line 1055, in main
  File "click/core.py", line 1657, in invoke
  File "click/core.py", line 1404, in invoke
  File "click/core.py", line 760, in invoke
  File "click/decorators.py", line 26, in new_func
  File "chia/cmds/plotters.py", line 17, in plotters_cmd
  File "chia/plotters/plotters.py", line 541, in call_plotters
  File "chia/plotters/chiapos.py", line 58, in plot_chia
  File "asyncio/runners.py", line 44, in run
  File "asyncio/base_events.py", line 649, in run_until_complete
  File "chia/plotting/create_plots.py", line 232, in create_plots
RuntimeError: std::exception
[1590] Failed to execute script 'chia' due to unhandled exception!
... obviously, run in a screen session ...
$ (screen) chia plotters chiapos --compress 0 --buffer 3408 --threads 4 --tmp_dir /mnt/ssd/chia/temp --final_dir /mnt/hdd/chia/plots --farmerkey 93c479a2de1e982f6b8cc15373e67ff851bf916ac10e91cb2cf1c512214a262697e9144a4a2202bd6e1c0a389779788d --contract xch1dp7qxxfhwq6s4ed2psn9mxk4rw0fpzk02elm82w3wqr2eg4rqfcqhtp725 --size 32 --count 1
Getting there! I now have 4 plots and it's come down from Never to 180 years to 90 years to 48 years so the more plots you make the greater your chance of getting paid more :-) ...
Farming status: Farming
Total chia farmed: 0.0
User transaction fees: 0.0
Block rewards: 0.0
Last height farmed: 0
Local Harvester
   4 plots of size: 405.464 GiB on-disk, 405.600 GiBe (effective)
Plot count for all harvesters: 4
Total size of plots: 405.464 GiB, 405.600 GiBe (effective)
Estimated network space: 31.022 EiB
Expected time to win: 48 years and 2 months
Stopping Chia Properly
Yeah, don't just shutdown the computer. You need to stop chia nicely then shutdown the computer.
There's probably a systemd for that, but in the meantime type 'chia stop farmer' ...
$ chia stop farmer
chia_harvester: Stopped
chia_farmer: Stopped
chia_full_node: Stopped
chia_wallet: Stopped
Multiple Harvesters
https://docs.chia.net/farming-on-many-machines/
Prepare your second machine and do all the ssl ca copying stuff (paul will add history to this section later!)
Start just the harvester on the machine and then check on the Farmer that it has connected ...
$ chia start harvester
chia_harvester: started

$ netstat -ntap |grep 'IP ADDRESS'
tcp        0      0 192.168.0.158:8447      192.168.0.165:41998     ESTABLISHED 32300/chia_farmer

$ chia farm summary
Remote Harvester for IP: 192.168.0.165
0 plots of size: 0.000 MiB on-disk, 0.000 MiBe (effective)
When it has finished creating a plot, you will see a second Harvester on the Foxy Pool admin screen, and your Farmer will show the remote having 1 plot ...
$ chia farm summary
Farming status: Farming
Total chia farmed: 0.0
User transaction fees: 0.0
Block rewards: 0.0
Last height farmed: 0
Local Harvester
   19 plots of size: 1.881 TiB on-disk, 1.881 TiBe (effective)
Remote Harvester for IP: 192.168.0.165
   1 plots of size: 101.374 GiB on-disk, 101.400 GiBe (effective)
Plot count for all harvesters: 20
Total size of plots: 1.980 TiB, 1.980 TiBe (effective)
Estimated network space: 31.377 EiB
Notifications
It can take days to finish plotting on a Raspberry Pi or a NanoPC so use your Pushover account to be notified when the plotting has completed :)
/usr/bin/curl -s --form-string "token=xxxxxxxxxxxxxxxx" --form-string "user=xxxxxxxxxxxxxxxx" --form-string "title=Chia Farmer" --form-string "message=has finished plotting." --form-string "priority=1" https://api.pushover.net/1/messages.json &>/dev/null
Blogs Information
This is nice with instructions and commands for setting up the SSDs and running the cli for plotting ...
https://chiadecentral.com/best-nvme-for-chia-plotting-budget/
Budget Plotting Rig
https://chiadecentral.com/budget-plotting-build/
Plots Calculator
https://plot-plan.chia.foxypool.io/
Warning
Hard drives have moving parts and wear out, so I am thinking I need a regular replication process to copy a complete hard drive to a newer one just in case :)
Monitoring
Connecting the UI to a Remote Daemon
Backups
Backup the Chia Full Node Database
Auto Start
Mobile Phone Mining
Mobile mining is one of the most exciting recent tech innovations for creating digital currency tokens. Mobile mining is the creation (i.e. mining) of cryptocurrencies using just a smartphone whereas traditionally it requires elaborate setups of Graphics Processing Units (GPUs) and Application-Specific Integrated Circuits (ASICs) that consume a lot of power. Mobile crypto mining is enabled through applications like MinerGate, Mobile Miner, and Bitcoin Miner.
https://github.com/VerusCoin/Verus-Desktop
Solo Lottery Mining
This is the least amount of effort for the slimest chance of a high reward (about 180 Billion to one).
LOLMiner
AMD & Nvidia & Intel Miner for Etchash, Autolykos2, Beam, Grin, Ae, ALPH, Flux, Equihash, Kaspa, Nexa, Ironfish and more.
Best Dual Miner for KASPA and ALPH with full Unlock LHR in all ALGOs.
https://github.com/Lolliedieb/lolMiner-releases
XMRig
XMRig is a high performance, open source, cross platform RandomX, KawPow, CryptoNight and GhostRider unified CPU/GPU miner and RandomX benchmark. Official binaries are available for Windows, Linux, macOS and FreeBSD.
Installation and Usage
System Tweaks
First, if you have 4GB or more RAM for your rig, then enable Huge Pages support in Linux, which will improve your mining performance ...
sudo bash -c "echo vm.nr_hugepages=1280 >> /etc/sysctl.conf"
sudo sysctl -w vm.nr_hugepages=1280
Reduce CPU Usage
In your config, look for something like:
"rx/0": [-1, -1, -1],
The number of -1's will be the number of threads the miner will use (in the above case, it's configured to use 3 threads). Just start removing -1's until you get the overall CPU usage you're looking for.
Compile Software
Generate Configuration
Generate your config file using the XMRig Wizard, which will look something like this ...
{
   "autosave": true,
   "cpu": true,
   "opencl": false,
   "cuda": false,
   "pools": [
       {
           "coin": "monero",
           "algo": "rx/0",
           "url": "stratum+tcp://randomxmonero.auto.nicehash.com:9200",
           "user": "NHbLd5exQeCGGyWnopVoLHLbzexKN5z8iq7p.raspberrypizero2",
           "pass": "x",
           "tls": false,
           "keepalive": true,
           "nicehash": true
       }
   ]
}
Start XMRig
Then, save it to a file and use that on the command line ...
./xmrig -c /Users/paullittlefield/xmrig_config.json
If successful you will see the following ...
* ABOUT        XMRig/6.20.0 clang/13.0.0
* LIBS         libuv/1.46.0 OpenSSL/3.1.2 hwloc/2.9.2
* HUGE PAGES   supported
* 1GB PAGES    unavailable
* CPU          Intel(R) Core(TM) i5-4308U CPU @ 2.80GHz (1) 64-bit AES
               L2:0.5 MB L3:3.0 MB 2C/4T NUMA:1
* MEMORY       6.2/8.0 GB (77%)
               DIMM0: 4 GB DDR3 @ 1600 MHz 0x484D54343531533641465238412D50422020
               DIMM0: 4 GB DDR3 @ 1600 MHz 0x484D54343531533641465238412D50422020
* MOTHERBOARD  Apple Inc. - Mac-189A3D4F975D5FFC
* DONATE       1%
* ASSEMBLY     auto:intel
* POOL #1      stratum+tcp://randomxmonero.auto.nicehash.com:9200 coin Monero
* COMMANDS     hashrate, pause, resume, results, connection
* OPENCL       disabled
* CUDA         disabled
[2023-08-10 21:47:09.349]  net      use pool randomxmonero.auto.nicehash.com:9200  34.149.22.228
[2023-08-10 21:47:09.350]  net      new job from randomxmonero.auto.nicehash.com:9200 diff 238106 algo rx/0 height 52433
[2023-08-10 21:47:09.350]  cpu      use argon2 implementation AVX2
[2023-08-10 21:47:09.350]  randomx  init dataset algo rx/0 (4 threads) seed c5596b1df4d0b3f5...
[2023-08-10 21:47:09.942]  randomx  allocated 2336 MB (2080+256) huge pages 0% 0/1168 +JIT (592 ms)
[2023-08-10 21:47:20.091]  randomx  dataset ready (10148 ms)
[2023-08-10 21:47:20.091]  cpu      use profile  rx  (2 threads) scratchpad 2048 KB
[2023-08-10 21:47:21.257]  cpu      READY threads 2/2 (2) huge pages 0% 0/2 memory 4096 KB (1167 ms)
[2023-08-10 21:47:39.118]  net      new job from randomxmonero.auto.nicehash.com:9200 diff 238106 algo rx/0 height 52433
NVIDIA CUDA
The CUDA plugin build is optional and only required if you like to use NVIDIA GPUs. Follow instructions on https://developer.nvidia.com/cuda-downloads to install CUDA then do the following ...
git clone https://github.com/xmrig/xmrig-cuda.git
mkdir xmrig-cuda/build && cd xmrig-cuda/build
cmake .. -DCUDA_LIB=/usr/local/cuda/lib64/stubs/libcuda.so -DCUDA_TOOLKIT_ROOT_DIR=/usr/local/cuda
make -j$(nproc)
Then, continue with the main XMRig installation.
https://xmrig.com/docs/miner/build/ubuntu
NiceHash
NiceHash is the world's leading hashpower marketplace, where you connect your computers as miners and earn Bitcoin for every share.
Links
CPU and GPU Mining with NiceHash QuickMiner
NiceHash Rig Manager User Guide
Connect HiveOS rig to NiceHash
Mining Hardware
| Type | Name | Speed | NiceHash Profitability |
|---|---|---|---|
| CPU | Intel(R) Core(TM) i3 CPU M 380 @ 2.53GHz | 0.20 kH/s | 0.00000035 |
| CPU | Intel(R) Core(TM) i5-4250U CPU @ 1.30GHz | 0.25 kH/s | 0.00000111 |
| CPU | Intel(R) Core(TM) i5-6200U CPU @ 2.30GHz | 0.75 kH/s | 0.00000125 |
| CPU | AMD FX(tm)-4350 Quad-Core Processor @ 4.20GHz | 0.95 kH/s | 0.00000104 |
| GPU | Nvidia GeForce GTX 960 | 7.15 kH/s | ???? |
| ASIC | LKETC Dragon | 130.00 kH/s | on public-pool.airdns.org low difficulty |
| ASIC | GekkoScience 2PAC | 9.80 GH/s | on Braiins Pool |
| ASIC | GekkoScience COMPAC-F | 120.80 GH/s | on Braiins Pool |
| Example | Example | Example | Example |
Disable X on NiceHash OS
- Set your SSH password and/or SSH Key in the
configuration.jsonfile on the root of the USB drive. - Use the USB drive in your computer and boot as normal.
- Watch the NHM4 Information screen for registration and check your web Dashboard for the rig to appear correctly.
- Log in to your rig over SSH and type 'sudo -i' to become root.
- First, disable X with the command
systemctl disable lightdm.service - Second, make the boot console only with the command
nano /etc/default/gruband change the lines so that it they readGRUB_CMDLINE_LINUX_DEFAULT="text nomodeset quiet consoleblank=60"andGRUB_TERMINAL=console - Type the command
update-grubto save your changes. - Then, type
rebootand watch the magic happen :)
Help
How to make a Coinbase withdrawal from NiceHash
Hiveon
Hiveon is the ultimate mining platform which allows users to setup, mine and control processes more effectively and hassle-free across thousands of rigs all from a single place. Everything you and your team need to keep your farm at peak efficiency.
- Farm = a group of rigs which mine.
- Rig = a mining device equipped with a motherboard, CPU, RAM, SSD/HDD, and GPU.
- Worker = a piece of hardware which will mine.
Setup
Download the zip installer to burn on to an SSD
I really needed these simple, step by step instructions because it is not clear and some of the links are dead (sigh).
STAGE 1
- create an account at Hiveon
- confirm the link in the email
- log in
- your first farm will be automatically created
- click add rig
- follow the wizard to download the Hiveon OS and burn it to your USB drive
- in the wizard, download the rig.conf file
- when the USB drive has finished being created, take it out, then back in and mount HIVE partition
- copy that rig.conf file to the HIVE partition and then unmount the drive partition
- pull out the drive and put it in your mining rig computer
- start the computer and watch your Hiveon Dashboard for the rig to appear in your farm
STAGE 2
How to create a wallet and a flight sheet, and to start mine in Hiveon OS
My God, this was hard work...
https://hiveon.com/forum/t/nicehash-read-error-end-of-file/81387/8
Help
Remove Missing Worker Graphics Card
Farm > Rig > Settings > Cards/Boards Quantity
Number of cards/boards in the worker increases automatically. If you need to decrease it, please update this parameter.
Change the repo used in the HiveOS ubuntu distribution
Dashboard > Farm > Rig > Settings > Repo Select: http://download2.hiveos.farm/repo/binary
When you try to upgrade and it fails with the following error:-
selfupgrade && sreboot (failed, exitcode=100)
Open a web shell and type the following ...
sudo -i
rm /var/lib/apt/lists/* -vf
Edit the file /etc/apt/sources.list.d/hiverepo.list and delete all of it then add this line ...
deb [trusted=yes] http://download2.hiveos.farm/repo/binary /
Then, continue with these commands ...
apt-get clean
apt-get update
apt-get check
selfupgrade
sreboot
Update the Kernel
hive shell start
hive-replace -y -s
reboot
Links
Connect HiveOS rig to NiceHash
The most profitable Ethereum Classic mining pool for GPU rigs
How to Install Hive OS to a M.2 SATA or mSATA drive
Bobcat Miner 300
The Bobcat Miner 300 is a wireless hotspot miner that allows users to mine Helium (HNT) cryptocurrency by providing wireless coverage and processing wireless transactions.
Setup
Current firmware version: 1.0.3.17
My firmware version: 1.0.2.1Z_11217
Plug in your Ethernet cable first, then turn it on. Find out the IP address by using a network scanner then connect to it with your web browser. This will load the 'Diagnoser Diagnostic Dashboard' Then, click Reset to reset it, which will force it to firmware update over the Internet (and not it's antenna). When prompted, type "I Agree" and then YES, and then type in the username and password:-
username: bobcat
password: miner
Wait. Wait some more. During The LED light will turn white, yellow, red, yellow and then green. This can take days. Wait for the light to go GREEN.
Continue with the Quick Start Guide.
Help
https://zendesk.bobber.com/hc/en-us/articles/4412905659675-How-to-Get-OTA-Updates-
https://cryptoguzzler.com/bobcat-miners-everything-to-know/
https://www.reddit.com/r/HeliumNetwork/comments/12v5mbg/bobcat_miner_stuck_at_error_wait/
https://www.reddit.com/r/HeliumNetwork/comments/15b8h7d/setting_up_bobcat300_uk/
https://device.report/bobcat/MINER3001
Fix OLD Firmware Bug With NEW Nebra Firmware
NEBRA Firmware and Instructions
DISCORD INSTRUCTIONS
This method is tested and verified now on Linux and Mac ... (Image only currently works on g290 and g295)...
We also support g280 (which is the 1gb bobcat, this uses a different image though and can run using SD card. See https://support.nebra.com/support/solutions/articles/24000085839-getting-started-with-bobcat-1g
sudo apt update
sudo apt install snapd
sudo reboot
sudo snap install core
sudo snap install rkdeveloptool --edge
Follow these instructions to install the Rockchip flashing tools depending on the OS you run on your PC: https://wiki.radxa.com/Rock3/install/rockchip-flash-tools.
If you try to compile on Linux and you receive this error ...
configure: error: C++ preprocessor fails sanity check
Then you look in side the error.log file and find this ...
cpp: fatal error: cannot execute 'cc1plus': execvp: No such file or directory
Then you install these extra programs ...
sudo apt-get install gcc g++
Then you can continue to compile ...
aclocal
autoreconf -f -i
CXXCPP=/usr/bin/cpp ./configure
make
Copy the software to your main system location, ready for running ...
sudo cp -av rkdeveloptool /usr/local/bin/
sudo ldconfig
Test to make sure it works ...
rkdeveloptool -v
Download and extract/unzip the Helium Nebra OS image for the Bobcat RK3566. https://github.com/NebraLtd/helium-bobcat-rk3566/releases
Open the case of the Bobcat unit so you can access the two small buttons on the board labeled "reset" and "recovery" or similar. You will need a T9 Torx Screwdriver - https://www.ebay.co.uk/itm/193865952874 or just the end bit https://www.ebay.co.uk/itm/334425081302
Use a micro USB cable to connect the Bobcat to your PC (below instructions for Mac and Linux). The Bobcat has two micro USB connectors; use the one that's accessible from the back panel (labeled "USB_OTG" on the PCB).
Power the Bobcat via its regular power adapter while connected to the PC via micro USB.
Press and hold the "recovery" button; quickly press and release the "reset" button; release the "recovery" button after about 1 second. This will put your device into the so-called "loader" mode.
Then run ...
sudo rkdeveloptool ld
... which should print a device in "loader" mode.
DevNo=1 Vid=0x2207,Pid=0x350a,LocationID=102 Loader
Then run ...
sudo rkdeveloptool ef
... which should take about one minute to erase the flash.
Erasing flash complete.
Then you need to reset the board by pressing the reset button, and afterwards run ...
sudo rkdeveloptool ld
... which should print a device in "maskrom" mode.
DevNo=1 Vid=0x2207,Pid=0x350a,LocationID=102 Maskrom
Then download and install the new ROM with ...
wget https://dl.radxa.com/rock3/images/loader/rock-3a/rk356x_spl_loader_ddr1056_v1.10.111.bin
sudo rkdeveloptool db rk356x_spl_loader_ddr1056_v1.10.111.bin
... which downloads and installs the bootloader used for various rkdeveloptool commands.
‘rk356x_spl_loader_ddr1056_v1.10.111.bin’ saved [453056/453056]
Downloading bootloader succeeded.
Then run ...
sudo rkdeveloptool td
... which should succeed communicating with the device.
Test Device OK.
Then run ...
sudo rkdeveloptool wl 0 /path/to/extracted_nebra_image.img
... replacing with the actual image path. This will write the OS image onto the eMMC at address 0.
Write LBA from file (100%)
Then you just need to reset (press reset button) the board and enjoy Nebra firmware.
You will need to use Ethernet initially. And you can set up the WiFi again using the Nebra app over Bluetooth.
You can verify its working by checking the following ...
- device will appear in your network with hostname of nebra-xxxxxx where the Xs are the last 6 digits of the MAC address (this will be a different MAC address to what is printed on the device label)
- after the unit has fully booted you will see a green light flashing
- after the unit has fully booted you should see a Bluetooth device advertised for 5 minutes after it boots up (either via the Nebra hotspot app or another Bluetooth scanner app)
- after the unit has fully booted up you should be able to access the Nebra diagnostics page on the local IP address of the miner or the hostname mentioned above using http://nebra-xxxxxx/ or http://nebra-xxxxxx.local/ where the Xs are the last 6 digits of the MAC address (this will be a different MAC address to what is printed on the device label)
- after the unit has fully booted you should be able to see an SSH client on port 22222 (you won't be able to log in but you should be able to see/ping it)
Good luck.
REALLY GOOD INFORMATION AND TROUBLESHOOTING PAGE
Docker
Hardware Miners
altcoin usb miners. Work great for beginners and novice alike. Windows drivers installed on hardware so it's basically plug and play. Cgminer and bfgminer work great with linux. A USB hub and a few of these miners and you will have your own little mining farm. Raspberry pi makes good controller board.
Top 10 USB ASIC Miner - USB Flash Drives
USB ASIC SCRYPT 144KHS DRAGON LITECOIN MINERS
BitAxe
The BitAxe is a fully open source hardware Bitcoin ASIC miner.
BitAxe 201 - It says U.S. only but use a reshipping service like Stackry or MyUS to get it to the U.K. ;-)
Troubleshooting
Make sure you only put the domain name part in to the Axe OS Settings page e.g. eu.stratum.braiins.com and not stratum+tcp://eu.stratum.braiins.com:3333
If the Wireless will not connect, you can take the miner out of range of your wifi and use the USB port to provide enough power just to do the settings. The miner will try 5 times to connect and then will reset itself and you can connect to its own wifi hotspot to redo the settings again. The RESET button on the board does not work at this time.
Goldshell
Goldshell make small, quiet, low power ASIC miners.
Raspberry Pi
This will not mine, but is only used as a controller for the ASIC USB.
This is an example /etc/rc.local file which starts the miner, keeps a ping on the server alive and sends a Pushover notification when it has booted ...
#!/bin/sh -e
#
# rc.local
#
# This script is executed at the end of each multiuser runlevel.
# Make sure that the script will "exit 0" on success or any other
# value on error.
#
# In order to enable or disable this script just change the execution
# bits.
#
# By default this script does nothing.

# Print the IP address
_IP=$(hostname -I) || true
if [ "$_IP" ]; then
  printf "My IP address is %s\n" "$_IP"
fi

sleep 10s

/etc/init.d/procps force-reload

# disable HDMI
/usr/bin/tvservice -o

screen -S MINER -d -m /root/cgminer-kanoi/cgminer --gekko-2pac-detect --url stratum+tcp://eu.stratum.braiins.com:3333 --user mybraiinsusername.raspberrypi-asic-2pac --pass my password

sleep 10s

screen -S PING -d -m /usr/bin/ping -i 10 eu.stratum.braiins.com

/usr/bin/curl -s --form-string "token=xxxxxxxxxxxxxxxx" --form-string "user=xxxxxxxxxxxxxxx" --form-string "title=`hostname -f`" --form-string "message=has booted with IP address `hostname -I`" https://api.pushover.net/1/messages.json &>/dev/null

exit 0
GekkoScience
https://github.com/kanoi/cgminer
https://pool.braiins.com/ - worked first time!
Instructions
Build the software ...
sudo -i
apt update
apt install build-essential autoconf automake libtool pkg-config libcurl4-openssl-dev libudev-dev libusb-1.0-0-dev libncurses5-dev zlib1g-dev git screen -y
mkdir cgminer-kanoi
git clone https://github.com/kanoi/cgminer.git cgminer-kanoi
cd cgminer-kanoi
./autogen.sh
CFLAGS="-O2 -Wall -march=native -fcommon" ./configure --enable-gekko
make
./cgminer --version
Check the hardware ...
PLUG IN THE ASIC
dmesg | tail -n20
[ 4957.097527] usb 2-1.4: new full-speed USB device number 6 using xhci_hcd
[ 4957.198835] usb 2-1.4: New USB device found, idVendor=0403, idProduct=6015, bcdDevice=10.00
[ 4957.198843] usb 2-1.4: New USB device strings: Mfr=1, Product=2, SerialNumber=0
[ 4957.198846] usb 2-1.4: Product: FT232EX
[ 4957.198848] usb 2-1.4: Manufacturer: FTDI
[ 4957.218436] usbcore: registered new interface driver usbserial_generic
[ 4957.218450] usbserial: USB Serial support registered for generic
[ 4957.228500] usbcore: registered new interface driver ftdi_sio
[ 4957.228516] usbserial: USB Serial support registered for FTDI USB Serial Device
[ 4957.228594] ftdi_sio 2-1.4:1.0: FTDI USB Serial Device converter detected
[ 4957.228634] usb 2-1.4: Detected FT-X
[ 4957.230178] usb 2-1.4: FTDI USB Serial Device converter now attached to ttyUSB0

root@356fbd891b0e:~/cgminer-kanoi# lsusb
Bus 001 Device 002: ID 8087:8000 Intel Corp.
Bus 001 Device 001: ID 1d6b:0002 Linux Foundation 2.0 root hub
Bus 003 Device 001: ID 1d6b:0003 Linux Foundation 3.0 root hub
Bus 002 Device 002: ID 0781:5567 SanDisk Corp. Cruzer Blade
Bus 002 Device 005: ID 0000:0606
Bus 002 Device 006: ID 0403:6015 Future Technology Devices International, Ltd Bridge(I2C/SPI/UART/FIFO)
Bus 002 Device 003: ID 0000:0606 USB Hub 2.0 USB Hub 2.0
Bus 002 Device 001: ID 1d6b:0002 Linux Foundation 2.0 root hub
Start the software ...
COMPACF
screen -S MINER -d -m /root/cgminer-kanoi/cgminer --gekko-compacf-detect -o stratum+tcp://eu.stratum.braiins.com:3333 -u myusername.nuc-asic-compacf -p mysuperpassword123
... and with tweaks ...
screen -S MINER -d -m /root/cgminer-kanoi/cgminer --gekko-compacf-detect --gekko-compacf-freq 460 --gekko-mine2 --gekko-start-freq 250 --suggest-diff 442 -o stratum+tcp://eu.stratum.braiins.com:3333 -u myusername.nuc-asic-compacf -p mysuperpassword123
2PAC
screen -S MINER -d -m /root/cgminer-kanoi/cgminer --gekko-2pac-detect -o stratum+tcp://eu.stratum.braiins.com:3333 -u myusername.raspberrypi-asic-2pac -p mysuperpassword123
... and with tweaks (needs checking) ...
screen -S MINER -d -m /root/cgminer-kanoi/cgminer --gekko-2pac-detect --gekko-2pac-freq 460 --gekko-mine2 --gekko-start-freq 250 --suggest-diff 442 -o stratum+tcp://eu.stratum.braiins.com:3333 -u myusername.nuc-asic-compacf -p mysuperpassword123
If you see any of these errors, try taking the miner stick out of the USB socket and plug it back in again.
No device found!
GSD 0: Error, disabling now.
NerdMiner
A super small Bitcoin lottery miner that only uses 1 watt of power.
The Nerd Miner V2 is the ultimate micro Bitcoin mining solution for those seeking a compact, efficient, and captivating Bitcoin mining experience. The Nerd Miner V2 tries to solo mine a Bitcoin block. This means you have a chance to win a full Bitcoin block reward of 6.25 Bitcoin + transaction fees while supporting the Bitcoin network with hash power!
https://bitwater.ch/nerd-miner-v2/
https://docs.bitwater.ch/nerd-miner-v2/product-guide/setup
Mars Lander
To reset
Put SD card in a computer and delete the file called "deleteforfactorydefaults", then put SD card back in miner.
LKETC
Introduction
This is a cheap USB crypto miner that is no good for NiceHash or any other major mining pool.
Image of USB Bitcoin Miner with black box and gold writing
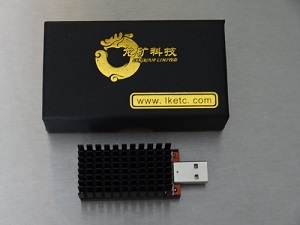
Installation
https://github.com/wareck/cgminer-lketc
Usage
Just use it on Con Kolivas' solo mining pool instead or another nice low difficulty share pool like NerdMiners or https://web.public-pool.io with the sha256 algorithm.
stratum+tcp://public-pool.io:21496
username: <your BTC address>.<worker name>
password: x
So, the Linux command line would be ...
screen -S CGMINER-LKETC /root/cgminer-lketc/cgminer --sha256 --lketc-clock 280 --lketc-chips 6 --url stratum+tcp://public-pool.io:21496 --user 3HE4HcwsYjdTrGEs6foT6mUd66KDGNjqCU.paully-lketc-dragon --pass x
Cooling
https://www.etsy.com/listing/1522609963/similar?ref=internal_similar_listing_bot
Web3
What is Web 3.0 and How Will It Change the Internet?
How to Invest in Web3? Best Ways to Make Money on Web3
Raydium
Raydium is a decentralized finance (DeFi) protocol built on the Solana blockchain. It brings together the power of blockchain technology and the convenience of decentralized applications (dApps) to provide users with a seamless and secure platform for financial activities.
How to use Raydium Swap | Solana DEX
DexScreener - The Penguin Dilemma
Help
Auto Start
Edit your /etc/rc.local file (in NiceHash OS or Raspberry OS) and add the following lines ...
# send message on boot
/usr/bin/curl -s --form-string "token=xxxxxxxxxxxxxxxxxxx" --form-string "user=xxxxxxxxxxxxxxxxxxxxxx" --form-string "title=`hostname -f`" --form-string "message=has booted with IP address `hostname -I`" https://api.pushover.net/1/messages.json &>/dev/null

# start ping
screen -S PING -d -m /usr/bin/ping -i 10 web.public-pool.io

# start cgminer
screen -S CGMINER-LKETC -d -m /root/cgminer-lketc/cgminer --sha256 --lketc-clock 280 --lketc-chips 6 --url stratum+tcp://public-pool.io:21496 --user yourbitcoinaddress.yourminername --pass x

# last line
exit 0
Miscellaneous
Avalon Nano 3 - BLOCKCHAIN SMART HOME - The portable heater mines bitcoin
My Miners
| hostname | ip address | pool | pool name | device | hashrate | coin |
|---|---|---|---|---|---|---|
| raspberrypi-miner-1 | 192.168.0.193/24 | Braiins | raspberrypi-asic-2pac-2 | GekkoScience 2-PAC | 20 GH/s | Bitcoin (BTC) |
| mars-lander-1 | 192.168.0.124/24 | Braiins | mars-lander-1 | GekkoScience 2-PAC | 20 GH/s | Bitcoin (BTC) |
| smart-hub-1 | 192.168.0.128/24 | Braiins | smart-hub-1 | GekkoScience COMPAC-F x 3 | 1 TH/s | Bitcoin (BTC) |
| nerd-miner-1 | 192.168.0.200/24 | Public Pool | nerd-miner-1 | Nerd Miner v2 | 50 KH/s | Bitcoin (BTC) |
| nerd-miner-2 | 192.168.0.188/24 | Public Pool | nerd-miner-2 | Nerd Miner v2 | 50 KH/s | Bitcoin (BTC) |
| nerd-miner-3 | 192.168.0.112/24 | Public Pool | nerd-miner-3 | Nerd Miner Mini | 50 KH/s | Bitcoin (BTC) |
| nerd-miner-4 | 192.168.0.113/24 | Public Pool | nerd-miner-4 | Nerd Miner Mini | 50 KH/s | Bitcoin (BTC) |
| gpu-rig-1 | 192.168.0.152/24 | 2Miners | paullyrainbowminer | NVIDIA 1080 GTX 8GB x 8 | 600 S/s | Bitcoin Gold (BTG) |
| kd-box-1 | 192.168.0.170/24 | F2Pool | kdbox1 | Goldshell KD Box | 1.6 TH/s | Kadena (KDA) |
| kd-box-2 | 192.168.0.192/24 | F2Pool | kdbox2 | Goldshell KD Box Pro | 2.6 TH/s | Kadena (KDA) |
| kd-box-3 | 192.168.0.???/24 | F2Pool | kdbox3 | Goldshell KD Box Pro | 2.6 TH/s | Kadena (KDA) |
| nanopc-t4-1 | 192.168.0.156/24 | Foxy-Pool | ffe475f778 | NanoPC T4 | Plots of 103 GB | Chia (XCH) |
| nanopc-t4-2 | 192.168.0.158/24 | Foxy-Pool | 0f6ada7b5e | NanoPC T4 | Plots of 103 GB | Chia (XCH) |
Addresses
 BTC - 3HE4HcwsYjdTrGEs6foT6mUd66KDGNjqCU
 BTG - GVpt8UDKMKQyBMNicXshS5H7yefSwXPHJ3
USDT - 0xde408c31bfd724d5f9dac63f3cb09959561cf4e5 (BNB Smart Chain Network)
 XCH - xch1mgftqreqrswfq6m2r0lrt963jy6z7ylas9qw0g6l0ggyr8unpsyswe95m4
 KDA - k:4ca147754957383afa70018db01beefd2017f1e68f25aff1ae17eae604c176e8
LTNG - realtimer13@walletofsatoshi.com